Friday, 21 November 2014

Pop Expo Preview and Happy Halloween - Quick Baby Batman Tutorial!

Happy Halloween, internet!
<edit> This was written last weekend and I forgot to post it.  Ottawa Pop Expo is now TOMORROW, and the costume I wrote about at the bottom of the post is (almost) finished, and looks pretty darn good for only a week's worth of work! More later... </edit>

Hey internet peeps! Time flies when you're having fun, and damn is it ever flying - Baby Crankypants is already 4 months old! Halloween is already two weeks in the past at this point, but I had a great time getting things together for my munchkin, as in TWO costumes, one to match my Robin, and something new for Halloween AND Pop Expo - which means I need to make one so I can match her!

I'm sure it's no surprise that Halloween is my favourite holiday, eating candy, carving pumpkins into neat and intricate designs, and of course, dressing up in fun costumes - heck, it's that love of costumes that got me into cosplay in the first place! The big difference this year (aside from having someone small and cute to dress up alongside me) is that in February the hubby and I bought our first house - which means I could finally carve pumpkins and hand out candy! Another bonus with  having a house was that we have a little extra space, allowing my dear sister (remember, the one that REALLY likes Moria?) to come to the big city and look for employment opportunities not afforded in the small town where we grew up - and she's also on hand for assisting in baby wrangling and conspiring for pumpkin carving - where our mutual love of Moria took over!
Size tested!

After searching the city for a good spot to find pumpkins (the prices and sized BOTH sucked) I realized my backward logic and headed to the country - where I paid $7 for three sizable pumpkins, one of which was large enough to fit a small child (and yes, we tested this theory by plopping my daughter in it)!  Big Sis Crankypants took on the biggest of the three, doing what she does best, and drawing a lovely picture of Moria and his brick batties, then carving it out.  I tackled the other pumpkins with my dremel clone to give Moria MORE brick bats to keep him company, and voila! Pumpkins!


More pics are available at Big Sis Crankypants' Ask Moria blog
 We got great feedback from the neighbourhood residents, both young and old, though our efforts paled in comparison to the AWESOME Doom themed gourds that OTHER Big Sis Crankypants (younger than the first, but only by a matter of minutes) painstakingly dremel'd back home.
Holy effing crap they turned out awesome! Next year I wanna sculpt me some pumpkins!!

Anyway, so baby costume  #1 - big shock, a sweet little Batman to go with my Robin! It was super quick throw together for a party that was built around her Batman onesie - got a little one you want to turn into a Baby Batman?

You'll need:
-Batman onesie or plain gray onesie and materials listed here
-Long sleeve black onesie
-Black tights
-Black socks
-Black felt
-Black thread
-Black 3mm thick craft foam
-Yellow 3mm thick craft foam OR Yellow Worsted Weight Yarn AND an H8/5.00mm hook
-Scissors and/or xact-o knife

Onesie/cape - Don't have a Batman onesie (or don't feel like paying $12.99 for one)? Find a plain gray onesie and add the logo using the techniques in my tutorial to Customize Any Piece of Clothing. To make the cape, lay out the back of the onesie on a piece of bristol board and trace half of the neckline, then straight down to the desired length, throw in a few curves, and back up to the neckline diagonally. Fold the felt in half, and place the pattern on the fold, and cut out the cape! Pin in place along the back of the neckline and sew (by machine or hand) - done!

"Cowl" - Obviously a baby wouldn't be willing to wear a cowl for any extended length of time, so I made a little ear headband out of craft foam. The band was approximately 2 cm wide and 3 cm longer than the circumference of my daughter's head. One end was made into a little arrow, and a small slit was made at the other end to insert the arrow and complete the circle.  The ears were made in the correct shape with arrows just like the end of the band, and two slits were made in the right spots on the "top" of the band, and the arrows were pushed through slits! The headband stayed in place nicely AND she didn't mind wearing it one bit!

Belt - I crocheted my Baby Batman Belt, but if you don't crochet, it's easy enough to make one out of craft foam!

Craft Foam - Measure your baby's waist, and make a band in the desired width in the same manner as the band for the "cowl" above, but leave a little space as it babies are wiggly. The buckle can be cut out with an xacto knife, then slide the band through the buckle, and put the arrow through the slit around the baby's waist, then slide the buckle over the break in the band to hide the join.
Since this isn't field tested, I can't guarantee how long it will stay on for, but it should work for a photoshoot at the least, and may actually stay on well!

Crochet - Crocheted in 4 weight yarn with an H8/5.00mm hook, and totally made up as I went along - here's an approximation, but please understand I've never written a pattern before, hope it's legible:

ch - chain
sl - slip stitch
dc - double crochet
flo - front loops only

make a chain long enough to go around the munchkin's waist, then sl into first ch to make a circle

ch 2, dc in each ch around and sl into the top of the ch 2 - repeat until your belt is the desired thickness (I hit 3 rows)

The buckle gets tricky, so I made a diagram, though I'm not sure if it will help any! In each frame, the blue symbols are the current work, and the black are past work.


ch (enough to get across the belt) and sl into the bottom
ch 2 (to make first dc) and dc in each ch back across, sl into top
ch 2 and dc flo across to the desired width, cut and work in end

Attach at bottom, and repeat the same steps to complete the rectangle!

I know it's kinda wishy washy, but it allows you to customize it to the baby in question!

My widdle Dark Knight and I! FYI, she's too damn cute!
Putting it together - Probably obvious... but! Long sleeve black onesie on the bottom, then black tights (unless there's a skirt attached, like my little lady's), then the Batman onesie, followed by socks, headband, and belt! Taa-daa! You have your own little Baby Batman! To complete the look, add your own Robin costume, and voila, Parent/Baby Halloween perfection!

Off to save the princess before she can walk!
Alright, I know, what could compare? Baby Crankypants'  Pop Expo costume, dubbed Babby of Time by Big Sis Crankypants, I give you - Mini Link! I lovelovelove how this costume came together! The original concept came about when I was working on her Hylian Shield Zelda onesie back before Father's Day.  I had the template for each piece of the Hylian shield, so I cut each piece out in craft foam, intending to surprise Lord Crankypants with a mini-shield to add to his prolific collection of Zelda stuff, and for us to photograph the munchkin with during her newborn shoot!  Weeeellll, that never happened, and the pieces just sat around in my craft room waiting for a higher purpose.

Finally, with Halloween looming I got to work! Since I had a lot of sewing to do, I put the shield together, shaped, sealed, primed and sprayed it silver, then got my sister to paint it while I worked on the rest. This is as far as I got by the Halloween engagement where we debuted our tiny Link! I'll post more about my Mini-Link and how to make your own in the future.  With Ottawa Pop Expo coming up on November 22nd, I had already given up on finding the time to finish my Gaige, so I had decided that I wouldn't worry about getting a costume together for myself... then went back and forth for a whole ten days.  This led to an inevitable identity crisis, something about being only a "Mom" and no longer the person I was before, and finally I gave in and resolved to get to work on a Zelda costume for myself! 


Zeeeeellllllddaaaaaaa!
Aside from time (well, I guess alongside time) my biggest challenge will be battling my perfectionism - I have resolved to aim for recognizable rather than perfectly accurate. I chose Twilight Princess Zelda as I was using Twilight Princess Link to model the little lady's costume after, and decided to dedicate my time to the most identifiable and unique parts of the TP Zelda version - her banner, jewelry and armour. Instead of trying to sew something together in just 12 days, I picked up two dresses, one ivory and one purple to modify, and have already tracked down some lovely long gloves. I've already sewn the banner and painted the background colours (that ombre blue/gray was a PAIN!) - now all I need is for this weekend's house guests to go home so I can get back to work! The clock's a-ticking, keep watching to see how much work I actually get done before Pop Expo!

Hope all is going well out there in internet-land and that the rest of the world had an awesome Halloween! Next time I'll post about Pop Expo and maybe share a little on how to make your very own Baby Link costume!

Monday, 13 October 2014

Tutorial - Customize ANY Piece of Clothing!

For Gondor!
Hello world!!  I know this is pretty well my customary introduction by this point, but I guess it continually amazes me that people actually take time to read my blog - so thank you for reading, and holy heck, we just topped 14000 pageviews! I know it's been a little while since my last update, but now that Baby Crankypants has moved through both the will-only-nap-on-someone phase and the will-not-nap-at-all stage, we're finally at the will-nap-on-tummy point, and she's been known to go up to THREE hours at a time (though not dependably).  With more nap time comes more handsfree time for me, and more time to get back to work on cosplay! I'm not sure how much work I'll be able to get done between now and then, but Pop Expo is coming up at the end of November (Gaige is back on the table... if time permits), and of course I NEED to put together  a Halloween costume for the little miss, so there's plenty to be getting on with!
Okay, so I've promised this one over and over, so I figured it was time to finally follow through - my first NON (directly) cosplay related post! That said, it's totally applicable to cosplay as well, and I can think of all kinds of applications from non-embroidered patches to the back of Claire Redfield's jacket, to the T-Shirts worn by pop-culture icons and more - really, if you have the patience, you can customize ANY piece of clothing!

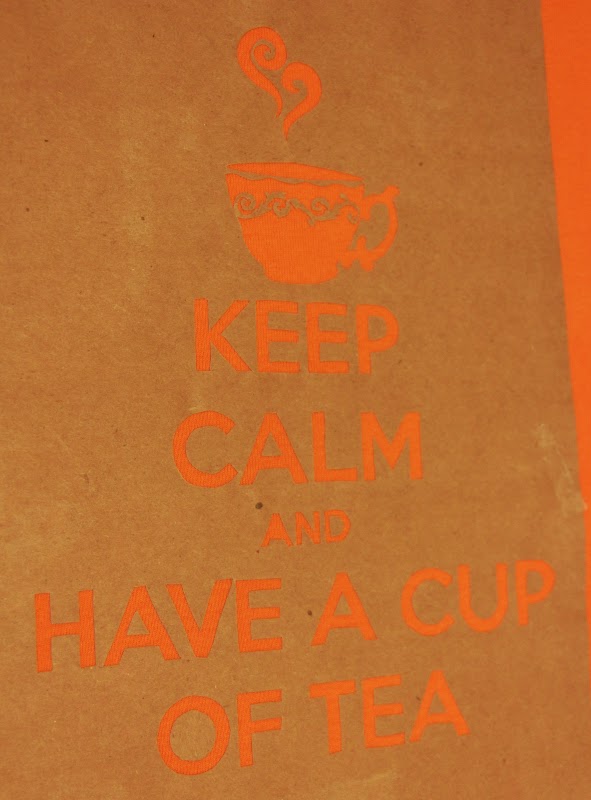
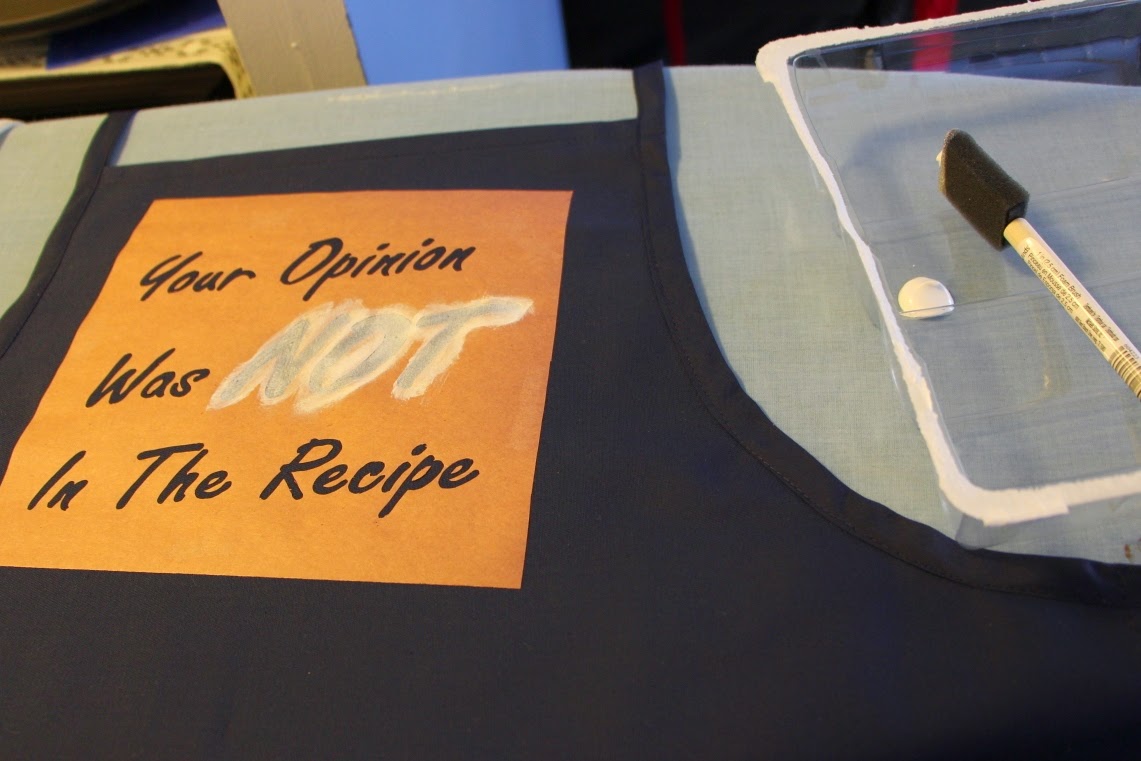
As of this posting, I've used this exact technique to customize five shirts, an apron, three onesies, two stocking labels, the "R" patch for my Robin costume, the batman logo for the hubby's last minute batman costume.... So on and so forth! Imagine the gifts you can make - the perfect shirt to fit the recipient's fandom/attitude/favourite drink/favourite car/whatever they'll appreciate most - EVERY time! I'll list the base technique first, then a few advanced variations to help make any piece you might want:

You'll need:
Your design, printed or drawn, in the correct size
Paper that's waxed on only ONE side (butcher or freezer paper)
Carbon paper
A pencil
A cutting mat
An exacto knife (a cutting machine like a Cricut or Silhouette Cameo may also be useful, but I'm not that fancy)
A piece of clothing or fabric that you'd like to give a personal touch (ensure it has been machine washed/dried beforehand for pre-shrinking)
An iron and ironing board
Sponge brushes (or preferred brush type)

Then your choice of paint, either:
Fabric paint (any kind works, whether puffy, dimensional, slick, dollar store special or jacquard, just try to use all the same to avoid a texture mess)
-or-
Acrylic paint and acrylic fabric medium

For ease of writing, the instructions will be written as though butcher's paper is being used (as that's what I use) and geared towards making a shirt, but you can sub out "butcher's paper" for "freezer paper" and "shirt" for whatever you want to work with - sweatshirt, scrubs, pants, scrap fabric - as you go.

First thing, find the design you want and get it on paper. If you're going freestyle, you can draw directly on your butcher's paper (the NON wax side), otherwise you'll have to size it out on the computer, then print it in the size that you want on your shirt. Make sure you're happy with the size before you move on.

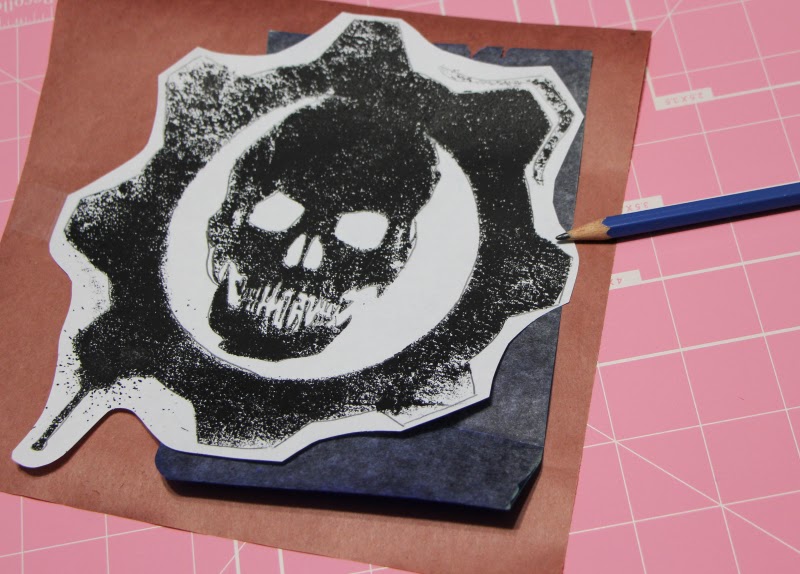
(Skip this step if you drew directly on the butcher's paper) Once you ARE happy with the size of the design, place the carbon paper on your butcher's paper, then lay the design on top, taping the corners down to the butcher's paper (the carbon paper can free-float, just make sure it's under the area you're tracing).  Then trace the lines of your design with a pencil to transfer the design on to the butcher's paper, making sure you don't move the design paper once you start tracing. Make sure you get all the lines and all the details, then carefully lift the design and carbon paper to double check that the transfer is complete.

Before you say - "why bother tracing it on if you could just tape the design to the butcher's paper and cut through both layers" - don't. I've been there, it works, but it's a pain, ESPECIALLY for anything with curvy lines or intricate details. Cutting through only the butcher's paper is much easier.

Once the design is on the butcher's paper, hit the cutting mat and cut out the design. Be careful to preserve the inside pieces of hollow shapes (like the triangles in "A"s or centers of "O"s) and keep them aside for when you apply the paper to the shirt. When finished, you should have an outline, and all the inside pieces you need - paper will cover anything that DOESN'T need colour, so any cut outs (negatives) that will need colour can be discarded.

Heat up the iron, making sure steam is OFF, as steam will prevent the paper from properly adhering to the fabric.  Carefully lay the outline on the shirt, paying attention to the orientation you desire (straight up and down or skewed in one direction or the other) and iron it on ensuring the paper and fabric stay flat. Carefully lay out the inside pieces, and iron them down too - be careful, as these pieces LOVE to move - feel free to iron on one at a time if you have trouble. Gently test the edges to ensure all the pieces are well adhered and re-iron pieces that are not.

Insert a flat barrier inside the shirt to prevent paint bleed-through from the side you're painting to the other side of the shirt. I usually use scrap cardboard or layers of scrap paper.


Finally - the fun part, painting! Squeeze your fabric paint into/onto whatever you're using as a pallete (I often use plastic containers from the recycle bin), then sponge on with the sponge brush. Make sure to take out only little bits of paint at any one time, otherwise it will dry in the palette before it's used. The first layer will take quite a bit of paint, as the paint needs to soak into the fabric fibers. Allow each coat to dry a little (15-30 min works) before applying additional layers.
Once you've painted enough layers to be satisfied with the degree of coverage, you can remove the butcher's paper.  I prefer doing so while the paint is still somewhat wet, as sometimes the design can crack a little if removing the paper while dry, just be careful not to smudge any still wet paint. Carefully remove inside pieces using the exacto knife to lift corners and peel out.

Once paint is dry (in accordance with instructions on bottle) run the iron over the painted design to heat seal. Make sure to wash shirt inside out to prevent damage to the design.

And that's the basics! The result - one unique piece of clothing!

Alternate techniques


Be warned, these are harder and/or more time consuming than the basic method, and not to be attempted by the faint of heart!

Designs with multiple colours

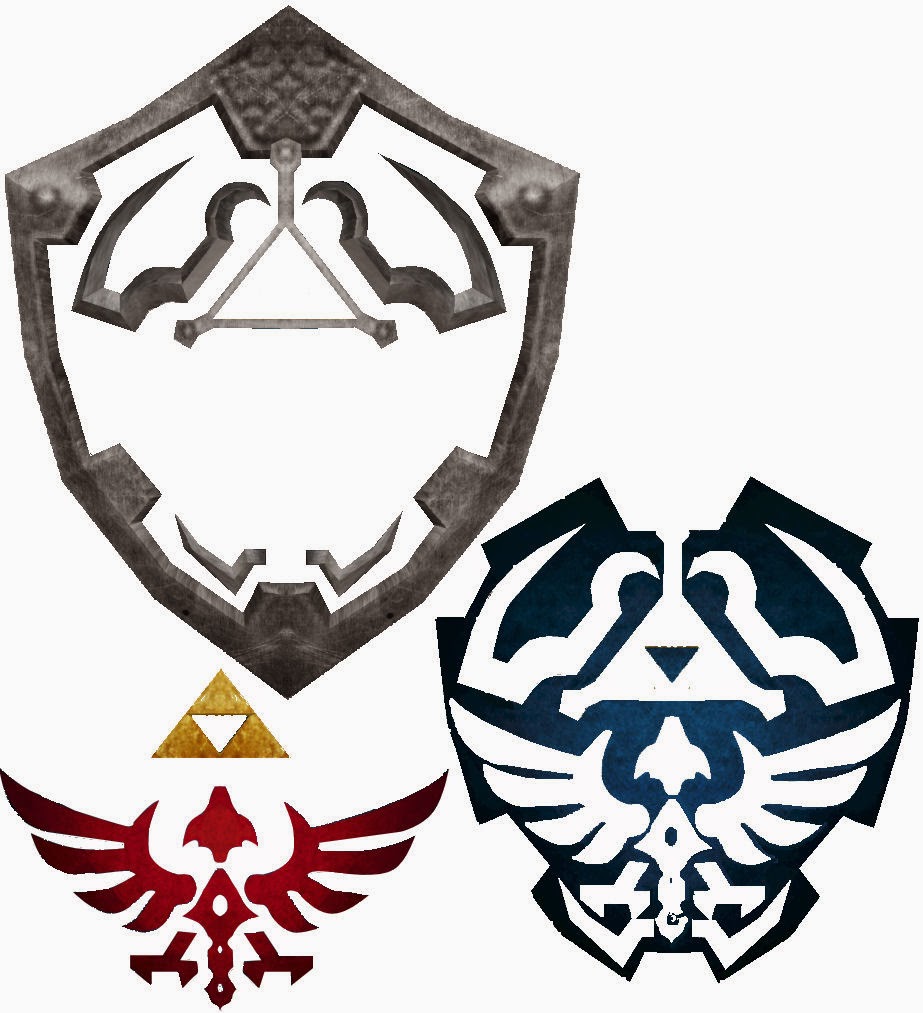
Some designs have multiple colours mixed in the one stencil, but others need different blocks of colour, example - the Hylian Shield has four distinct colours (silver, blue, gold/yellow and red) for which I made three seperate butcher's paper stencils.

For this technique, I separated the shield into colour based "pieces" in Paintshop Pro before printing, making sure to leave some extra "blank" space between the colours (a gap of a few pixels) to keep myself from having colour overlap. I left the gold/yellow and red on the same stencil set as they're separated enough that they could be painted in without bleeding together.

The same tracing and cutting techniques as above were used to make the stencil sets.

I started with the innermost design (the triforce and bird) as I figured it would be easier to build my way out from there. Once I was satisfied with the level of coverage, had removed the butcher's paper and had allowed the paint to dry, I applied the stencil for the blue, including pieces which were ironed directly on to the red and gold/yellow paint. Once the blue was satisfactory, the stencil removed and the paint had been allowed to dry, I ironed on the silver stencil, including a piece applied over the blue, red, and gold/yellow paint, and painted in the silver.  With the silver complete, I peeled off the last stencil and allowed the silver to dry.


Hylian Shield
One piece at a time!
Finally, for added dimension, I used my silver paint tube (designed to be used as a writer) to add the rivets and lines on the "metal" pieces to make the shield really "pop!"

Another design that used multiple colours (though only one stencil) was the Grub Killer (Clayton Carmine) design I put on the back of a shirt for one of my Gears Buddies.  On Carmine's armour, the "Grub Killer" and little omen appear to have been spraypainted over blood spatter, so I painted on the spatter manually (no stencil) and allowed it to dry before ironing the stencils over top - worked like a charm!
  
Varied/sketchy colour

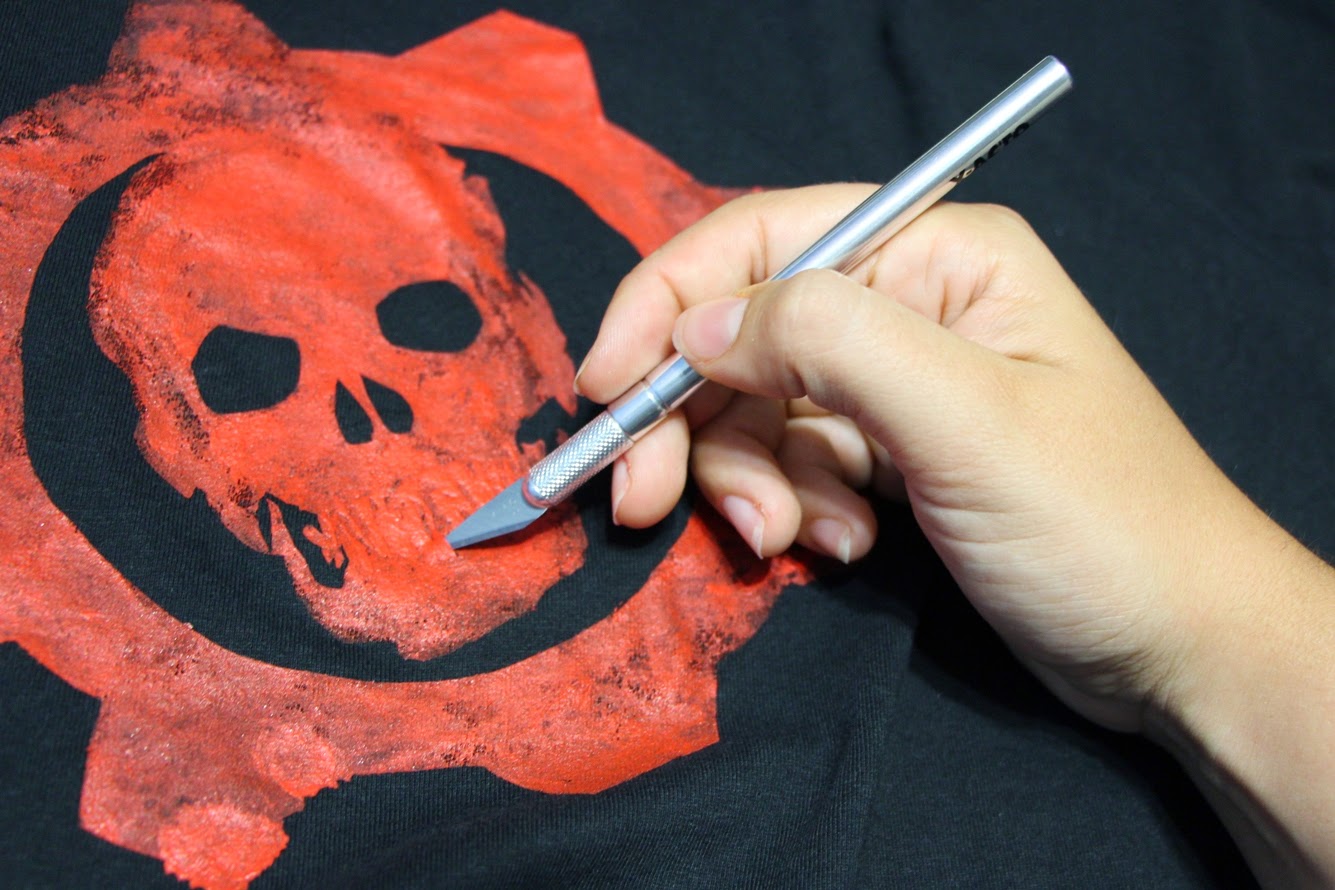
Sometimes solid colour won't provide the right look. For example, for my Crimson Omen shirts, to be accurate the red has to be varied - stronger in some areas and lighter in others. This was accomplished by sponging the colour on more lightly in some areas than others, adding extra layers where the colour is more intense, and painting in veins with a paint brush. I was careful to make it as close to the original as possible. Oh, and the little splatters around the drip were added by toothpick after the fact.


Detailed Painting

Warning: You need artistic ability, lots of time (the example took me a solid two hours for painting alone, not including dry time), and various paintbrushes for this. Also, instead of the tulip style fabric paint (from tubes) acrylic paint and fabric medium were used as they're thinner and more easily mixed.

Sometimes colour blocks aren't the look you're going for - you want details, gradients, and little finagly things like that!  For example, my Majora's Mask onesie just wouldn't be the same without the blending and little details.

In this technique, the butcher's paper is only used to make the outline of the design.  Once the outline was made, I painted it in with several layers of white to create a smoother base for painting - if you were to paint details directly on to the shirt, the fibers would make it one heck of a mess!

Unlike in the colour block method, I left the stencil in place to prevent any of the colours from ending up on the rest of the onesie. I drew the details lightly on to the white with a pencil (I used the cut-out of the mask, folded in half then eyes cut out to ensure symmetrical eye placement) and proceeded to paint, mix, and blend the colours as necessary to create the effect I wanted.

Majora's Mask Outline
Outline - Eye Placement - Pencil Sketched Details
Once everything was painted in as I wanted it, I removed the stencil.  Finally, to add some dimension I used my black fabric paint writer to outline the eyes, et voila! Perfect MM onesie! I'm not sure how well it will wash (I'm a little worried, but won't even try it 'till our little lady has worn it at least once) but I'll report back when I know!
Majora's Mask Colouring
Inside Colour - Horns - Finished!
So voila! Think of the possibilities! Fun, geeky shirts for less than a fortune! Personalized gifts for ANYONE! Customized shirts/costume pieces/patches for your favourite characters! I love this technique, and just can't get enough of it! PLEASE, if you use it to make something awesome, let me know, either by email - lady.crankypants@gmail.com, or by posting it up on my facebook page - http://www.facebook.com/crankypantscosplay! No promises on timeline between now and next post (I'd probably break it anyway) but rest assured I'll let you know how my Halloween costuming goes, and there will surely be some adorable pictures involved!  Until next time, you stay classy, internets!

Wednesday, 6 August 2014

Oh, baby! Projects for the little one!

Fresh tiny human!
Soooooo.... at 4:42 am on the day we were planning on having the Moria photoshoot, we got a baby instead! I was given a bit of a lecture about procrastination by Captain Crankypants, who had been looking forward to the shoot, but he was mollified by getting to take pictures of our beautiful, 8lb 6oz baby girl! Good thing I had been working hard on various little projects for her! Oddly enough, it's been over three weeks since, no idea where the time has gone - newborns are like time sinks.  

Oh, and by the way, as of today this lil' blog is officially over 10000 pageviews! How awesome is that? Thanks again for all the support, and for reading what I've had to write over the last year and a bit! That said, on with the show!

 Geeky Onesies!

I'll be posting more about these soon, but I just love them so much.  So far I've still only made the three - Majora's Mask, Triforce Eagle/Hylian Shield, and White Tree of Gondor, but I have a number of solid colour onesies and shirts as well as several more designs planned, and a few cut out and ready to go - stay tuned for more, and next up I'll be posting my Customize ANY piece of clothing tutorial so you can find out how to make your own!

Crochet Projects!

Early on in the pregnancy I took up crochet so I could make my babe her very own crochet baby blanket! Little did I know at that point, everyone we know knows how to crochet, and she's had ten made for her at this point (only two by me), but it was a nudge down a path that opened up all kinds of fun creative projects! I've made countless little hats, booties, slippers, and sweaters for her (and every baby we know) by this point, but where the real fun comes in is prepping for her newborn photoshoot! In order to avoid having the same pictures with the same outfits every other newborn has, I knew I had to come up with something fun and geeky for our little lady to wear - only two of these are crochet, but I may run out of time for finishing the other, so I'll keep it to myself for now.


A sample of my Crankypants Crochet Collection
Mermaid Tail!

I've seen various baby mermaid photos out there, so I just had to try my hand at crocheting a mermaid tail! The problem I found was finding a satisfactory pattern I didn't have to pay for - apparently I'm a total cheapskate. I knew the look I wanted, and I knew I wanted to used crocodile stitch for it, so I went about designing my own! I'll probably post the pattern sooner or later, but be kind, it was my first attempt at making my own, forgive me if it's not perfect - either way it turned out super cute!


Piranha Plant!


I've seen so many blasted Anne Geddes style photos of babies in flower pots, I figured the obvious gamer translation of this was... a baby in a warp pipe! And what comes out of warp pipes? Piranha plants, of course!  I started with a pretty standard baby hat pattern, and adjusted the edge to open like a mouth, then added white "lips", and made and stitched on a series of circles. The teeth were crocheted right on to the underside of the brim, and then the leaves were made and attached! I'll probably post the pattern for this too, just not yet!  Oh, and to allow for some variety in the photos, I also made a matching diaper cover just like Petey Piranha's little spotty briefs - so cute!
Buuuuut take one was a failure, as my child's head is massive, and the teeny little hat didn't stand a chance of stretching enough to fit. So take 2, I upped my hook size to up the gauge, and sooner or later I WILL get my piranha plant pictures!


The Up Nursery

I don't believe I had any reason to mention this before, but I hate pink. I hate it with a passion. As soon as I learned we were having a girl, my joy was mixed with dread at the thought of freaking pink everything, outfits, bedding, "girl" toys, "girl" lego, ugh. So needless to say, a pink princess room was NOT going to happen (at least not until she's five and able to demand it herself... maybe we can re-open negotiations then. Just maybe).

Well, the room we selected to be the nursery in the house was already two shades of blue when we moved in, so rather than paint it, I figured I would have to come up with a theme that fit the colour. Immediately I thought "sky," which was closely followed by "UP!" I LOVE Pixar movies, and Up is one of my favourites, what could be more fun than a multi-coloured house with a rainbow worth of balloons? It opened up the bedding and decor to fun, bright colours (so much better than baby colours) and gave me a nice big fun project to occupy the wait for baby!
I freaking love balloons!

It ALSO gave us a theme for just about everything, including our beautiful baby shower cake, made by a close friend, and my insistence on having a bouquet of beautiful balloons for our maternity photos!

The Mural


The template
So first up is the mural, an entire wall of house and balloons! It took a while to find an image I was happy with, but I found one I could work with and did a vector outline to print out on transparency paper, and the ever awesome Fatima found a second hand . I scaled the balloon size up for ease of drawing/painting (it would take FOR FREAKING EVER to do them in the proper size) and threw in Kevin on the roof as she was there in the original I found.

It's not finished yet, but we have about six months before she'll actually be sleeping in there anyway, so no REAL hurry - it'll happen!
PROGRESS! Loving it so far!

The Mobile

I looked everywhere for nice looking balloon themed decor.  It doesn't exist. I looked everywhere for mini fake balloons that don't look like garbage. They don't exist. I considered casting some in resin, but that was going to get pricey and complicated, AND resin fumes are extra bad for pregnant ladies/unborn babies, so instead, I found a cute little hot air balloon mobile pattern, then neglected the "hot air" portion of the equation, leaving just balloons! The balloons were made in felt using the size 2 balloon from this tutorial, and I used this papercraft Up house pattern, upscaled, to pattern out the house! I'm finished about six balloons at this point, and the house is underway, but that mofo is complicated, so it's going to take a while longer!

The Bedding

My intention was to have cloud/sky crib sheets and a multicoloured ruffled crib skirt, but I can't for the life of me find cloud pattern fabric that fits the aesthetic I was aiming for, so instead I just have turquoise fabric for the sheets, and will still be making the multicoloured ruffles, with pink bows in the corners for a little touch of girliness. I have all the materials, just need to get the ol' sewing machine out and make it happen!

And there's much more to come! If I can ever figure out how to make this little one to nap for more than ten minutes at a time.  Next time, I'll post one of the other articles I've written but not posted!! I'm sure it will be a blast no matter what I pick... whenever I have a moment to post it!  Until then, you stay classy, internets!

Wednesday, 14 May 2014

Ottawa Comiccon 2014 Con Report!


Hello peeps! Ottawa Comiccon 2014 has come and gone, and I'm happy to say I survived another year! Although I was working right up until the last minute, I successfully completed enough of my Moria to wear (though not as much as I had hoped) and had a blast strutting my stuff both in the halls and in the masquerade, in spite of the fact that Moria didn't get nearly as much recognition as Moxxi (obscure character, obscure series, and no cleavage = little love). That said, those who did know who I was were suitably impressed!

So attractive! Before the day crumbled
Saturday morning was one of those "comedy of errors" situations - it seemed no matter what I did, the world was determined not to cooperate. First I grabbed my model magic horns and found that one had cracked - not much I could do about it, but it was frustrating. For this make-up, I picked up better quality facepaint and a sea sponge applicator in hopes of having a better finish for my white makeup (as the girl at Audrey's had convinced me to do), but in spite of better than twenty minutes spent in front of the mirror, I couldn't get an even coating of white to save my life. Next, I grabbed my carefully crafted latex stitches (which I had made by paiting layer on layer of mould building latex on to plastic sheeting in the desired stitch pattern) and promptly dropped the 8 stitch chain on the floor, causing it to twist into a sticky, useless mess. I managed to salvage 5 or so of the X sitches, but it was a painful and frustrating process. Then I grabbed my belt off the table (after having laid it there to allow the e6000 I had used to glue on the buckle to dry) and discovered that the spray paint I had used to paint it hadn't cured properly, and therefore had adhered itself hopelessly to the plastic table cloth causing several chunks to rip off while trying to peel the buckle back. After painter's taping and throwing quick coat of silver on that, I went to burn the CD for my masquerade entry, only to discover that the track I had downloaded only had 26 sec of the song - luckily walk ons are only 30 sec (I filled the last four with a nice Moria laugh when I was on stage), but it was just another thing to add to the pile of stupid that my day was becoming.

Although I had planned to be out the door at 8:30 am in order to get there early enough to get decent parking, all the fun and games had delayed me to a 9:40 am departure, following which I hit heavy construction related traffic, and didn't even arrive at my con buddy Renee's place until just after 10:00. The only small stroke of luck that we came on was that the direction we chose to get in to the venue (only picked because of the proximity of a Tim Hortons to it) placed us in a spot to avoid the giant lineup for the overflow parking, which was a ten mile march away from the door, but at least we weren't waiting 30+ min just to park! Anyway, from there we headed to the door, waitied 20 min (seemingly for nothing), were finally let up to the door, and discovered that that line was only for people who pre-ordered tickets (which I hadn't as my phone wasn't cooperating when I had tried) and we had to walk to the other side of the building just to walk back to wait in line again, and the MOMENT we hit the door? The con got locked down due to a child having been lost.  AAAAAAARRRRGHHHH!  I'm a super laid back person normally, but after all of that I was just about ready to cry (I'll blame sleep deprivation and hormones).  I managed to keep my composure, and after another 10 min or so we were finally allowed in.

With my friend Christa, as Azula

The first thing I noticed about this year was that there were even MORE people than last year - it was practically impossible to move at times due to the sheer crushing number of people in the way. The set up had changed quite a bit, which was mildly confusing to me at first (having not thought to check the map beforehand) but I managed to find my way to the Masquerade registration anyway. The lovely masq staff were super accomodating in that even though I wasn't there early (as I had intended to be) they agreed to place me early in the lineup as I had a wedding reception to be at by 8:30 pm.  With the signing up accounted for, we checked the schedule for desirable programming. The two panels I was interested in - "Costumes on a Budget" (I can always use tips) and "Silicone Armour - It's a Piece of Cake" had both come and gone before we got through the door, but "Finding Serenity : A Firefly in the Night" was coming up, and Renee loves Firefly (as do I) so we figured we'd check it out! The panel was presented by the Ottawa Browncoats, and while it was a great introduction to the series and gave a few interesting behind the scenes tidbits and some interesting discussion on the strengths of some of the episodes, there was a little too much focus on the basics, and thanks to the late nights leading up to con, I found myself falling asleep (quite literally), so we ducked out a little early.  From there, we lined up in the nice long line for lunch at one of the little cafeterias, and picked up a slice of pizza each (reasonably priced at $5). We would have checked out the Food Court, but neither of us were smart enough to bring real money.

Following lunch, we walked the floor, and by walk, I mean shuffled along fighting
our way through the crowd or being pushed along, depending on the moment. It was a little too much for my level of patience by this point in the day, and it was hard to get a close look at ANYTHING.  I saw a few other One Piece costumes along the way, but for the most part it was at a distance, and when I
I found a Nami! Picture courtesy of Renee
complimented one Trafalgar Law in passing, he showed absolutely no indication of knowing who/what I was.  I DID run in to a lovely Nami outside the tower of T-Shirts!  We had a nice chat on the awesomeness that is One Piece. The merch I did see looked good, but it took us so long to do our first lap that I didn't have time to go for a second (when I usually make purchases) before I had to report to the green room.  That said, it was nice to get somewhere quiet where I could sit for a while! Just like last year, the green room was backstage for the main stage, so I was able to catch some of

KISHISHISHISHISHI!
the Edward James Olmos Q&A from the other side of the curtain, and some of the Leonard Nemoy Skype visit as well (which was plagued by technical difficulties, but worked itself out) which was fun, entertaining, and was crashed by Karl Urban - priceless!

As always, the wait was long, but Renee was there to keep me company and I got to chat with various cosplayers, and took the time to get caught up with Demelaa and Zeveelia of LITAS Cosplay, fellow Borderlands fans who I met last year at our impromptu Borderlands meetup! This year Demelaa was rocking Tiny Tina and Zeveelia switched sirens from Maya to Firehawk Lilith. Belziir was once again the official masq photographer, and I had a great little shoot with him. Luckily for me, he was one of the few people who recognized Moria, and he suggested a full on maniacal laugh pose, which worked out nicely - can't wait to see how the rest turned out!  Judging went well, the judges seemed suitably impressed with my work, the prosthetics, the embroidery and all.  I'm still not sure what the result was (seeing as I had to work the next day and missed the award presentation) but having seen the calibre of work I was up against, I'd be surprised if I was recognized this year.  That said, Demelaa and Zeveelia were selected for best paint detailing - awesome and well deserved!
LITAS on stage, photo by Pose4Effect


Since my original walk on plan had centered around my scissors (which weren't finished in time), I kinda had to come up with something new on the fly.  It was pretty simple, just striking poses, trying to look maniacal and the like, with a nice loud "kishishishishi"  as I went off stage - easy, right? Well first of all, I'm pretty sure I didn't get close to the full 30 seconds (I could be wrong, it just felt too fast) and then, just as I was heading off stage, my belt fell off (which elicited giggles from the audience).  Full on, dropped around the ankles, fell off, after it had behaved and stayed in place ALL DAMN DAY.  I played it cool, flicked the
On stage shot from insta_reviews - belt drooping ominously
belt off stage with my boot and carried on my way, but once I was off stage, I started laughing (quietly, as I didn't want to interrupt whoever was on after me) and couldn't stop for an extended period of time.

And that was that! As much as I hated having to take off and miss the rest of the masq (again) I really needed to get moving if I was going to make it to my cousin's wedding reception.  I retreated to one of the ladies rooms and made a quick change from full on cosplay mode to regular old pregnant lady heading to a wedding mode.  The most challenging part of this was trying to get the darn lipstick off - I've owned Graftobian before, my blue lipstick for Gaige is Graftobian, and I had no issue when testing it... Well for whatever reason, my purple was like dry tar, a heck of a pain to apply (let alone evenly), and impossible to get off.  Around the point when ALL of the rest of the makeup had been removed, the lipstick was still firmly in place and now tinged white by the makeup that had been rubbed off/around it. With some serious effort, I managed to scrape it off, shook out my hair, threw on a dress and some jewelry, and scampered off for some fun at my cousin's wedding reception! Yeah, I was pretty much dead by the time I got home at 12:45.

While I did enjoy my time at Comiccon this year, my overall experience wasn't as positive as last year, partly due to my own muck-ups (not fully finishing my costume, not sleeping enough, all the fun the morning of, arriving much later than intended, forgetting my insoles) and the rest was due to the ridiculous crowds.  I understand the draw and why Saturday was a popular day (it's the biggest day for stars, and most people who only get the one day pass pick Saturday), but it was much harder to get a good look at everything when you could barely move, and I was disappointed that I made it out of there with NO swag. My aim for next year (assuming I have my costume finished in time... assuming life with baby allows time for costuming) is to get the weekend pass (I won't have to worry about working, as I'll still be on parental) and do all my shopping/browsing on the Friday, then I won't be as stressed by the crows on Saturday, and can take my time and focus more on checking out panels and the like.  I still felt no desire to do the autograph or photo session thing, as much as I love some of the celebs on the bill (Christopher Lloyd, Edward James Olmos and Karl Urban come to mind immediately) waiting in a line to shell out money to have a moment in time, an autograph, a picture with them. I'm not sure who it would take to convince me to jump in there, but I'll see who's on the bill next year!

Moria held up pretty well to the rigors of the day, with the exception of the belt incident. As much as I had worried about my prosthetics, the spirit gum held fairly well, though by green room time I needed to apply a wee bit more spirit gum to one of the horns and a few stitches that were juuuuuust starting to come loose. All in all, costume success!

I'll leave it at that for this entry, next time I'll talk about the rest of the construction for Moria, and cover what I'm working on to finish up the costume before the big photoshoot with Capt Crankypants, which will likely be taking place at the beginning of June, or at very least before Baby Crankypants graces us with her presence! Hope those of you who hit Ottawa Comiccon had an awesome time!

Sunday, 4 May 2014

Comiccon Plans - Making Moria!

Awesome stuff! Thanks Lee!
Hello again internets! All is well in the Crankypants household, and Baby Crankypants is 30 weeks along, getting bigger and kicking stronger every day! I, on the other hand, have been busy running around town collecting bits and pieces for my Ottawa Comiccon costume.  Things are going well thus far, I just have to actually get some serious work done!  Before I get too far, I just wanted to make a shout out to pose4effect, a fabulous photographer who I have had the privilege to bump into at my last two (and only two, ha ha) cons, and who posted up an awesome edit he put together from a picture he snapped of me at Pop Expo!

The plan WAS to post all about my progress on Gaige (and it's all written up and ready to go) but I took too long getting the corresponding pictures together, so I'll be bumping her to the next post (or maybe the one after) and focusing entirely on my Comiccon plans and progress!

So I found out about our impending bundle of joy waaaaaay back in November, and while I was preoccupied with Gaige and Pop Expo (and, you know, the fact that I was pregnant) at the time, it didn't take long after Pop Expo for my thoughts to turn to Comiccon, and what was I going to do for a costume at seven months pregnant.  Of course, my first approach was to look for a pregnant character to cosplay, but none of the characters I found quite fit the bill for what I was after.  Actually, they were almost uniformly wearing boring dresses with no fun weapons or props of any kind - where's the challenge in that? From there I turned to badass characters with children (who must have been pregnant at some point) but drew nothing but blanks. A cute Chansey gijinka maybe?  Way too much pink for my taste (plus I haven't played Pokémon in AGES).


Isn't he beautiful? Or at least perfect for a pregnant lady!
Well, I was at a loss.  Luckily, a solution presented itself to me! My sisters got me hooked on One Piece, and as I was reading through and found myself in the Thriller Bark arc, I was stared in the face by the perfect character for a pregnant cosplay - the lovely, leek shaped, lazy captain himself, Shishibukai Gecko Moria (or Gekko Moriah, depending on where you look). I had already known of Moria's existance, seeing as he's my oldest (by a matter of minutes) sister's favourite character - so much so that she plays him online (and draws many, many pictures of him), but I didn't think of it until I actually saw him in action.  Not only does he have everything I look for in a cosplay - an awesome and complex outfit (challenging but in the realm of possibility) AND awesome weapon(s) (I mean GIANT SCISSORS! Who else has giant freaking scissors that separate into SWORDS?!) - and as a bonus, his super bottom-heavy shape is uniquely suited to a pregnant lady! Success! 

My crappy sketch, to see if it might work

Production is well underway at this point! After months of bringing materials together, once again I find myself with a short fuse - way too much to do, and way too little time to do it in (7 days left! Aaaaahhhhh!). You really think I would have learned my lesson by now. Oh, and if you're wondering why I'm wasting time blogging, this was written while at work and unable to work on the costume - trust me, as much as I love sharing, I would rather be making progress! Luckily, I have some extra days off this week, but I'm really going to have to apply myself - no distractions allowed!

Here's the plan! The intent was to be as faithful as possible to the original design, the trickiest part with Moria being that his design is so inconsistent - there are differences between the manga and anime, and even within those mediums his appearance changes all the time.  I picked out a few of the original artist's depictions, and am trying to follow those for the most part.  The biggest deviation I'll be making is using boots instead of shoes, which I chose to do in order to get a little closer to his proportions (his legs are hella-short, so I figured full length pants would look funny).

Stuff already under way:

Jacket - I verified before even starting that a normal, non-maternity blazer fit just about perfectly for Moria's open coat styling. Luckily, I already had a blazer pattern which I was using to make Gaige's vest, so I whipped that bad boy out and got to work - with Fatima's help for better fitting. This is where my cheapness really bit me in the behind, though, as I picked up fabric with a slight pin stripe instead of pure black, as the black was $22/yd, where the pin stripe was $3/yd on clearance. I started out trying to pick out the stripes, but realized quickly it would take too damn long, so I switched to colouring them in with sharpie and/or black fabric marker. They're still a litte bit visible in certain light, but I think it might add to the costume rather than detract - we'll see!

Colouring in pin stripes, the collar pieces and interfacing, and the magic of the suddenly horribly messy workspace
The main modifications needed were - extended all panels to accomodated pointed front and tail, collar pattern made for giant pointy stand-up collar, collar reinforced with heavy weight fusible interfacing and wire, sleeves shortened to fit into gloves. At this point the outer shell is together, the liner is almost completely together - left to do: sew in liner sleeves, add some hidden pockets, attach collar, shape bottom of coat (front points and tail), install liner, paint and sew on buttons.

Armbands - For the armbands I puzzled for a bit as to what to make them out of and how to go about doing it. Various ideas came to mind, but what I knew was that I wanted the dots to be dome studs of some sort. The only satisfactory studs I could find locally were actually upholstery nails, which I found in a 100 pack for under $5! In the end, the only material I figured would be able to hold the studs was leather, so I picked up a 3/4" leather belt, cut it to size for each band, painted with fabric paint - the sides silver and top with a blue/silver mix, and have begun banging the studs in. I'm completely satisfied with the look, but can't seem to get the dome to lie flat once I bend down the nail.... I'll keep working on that.

Left to do: bang in the rest of the studs, attach to gloves/sleeve - the plan for the sleeves (to maintain mobility) is to sew one end of the strap to the sleeve, and connect the two ends of the straps with thin black elastic so

Belt - The original plan was to go legit, working with an actual leather belt and everything - well, it didn't take very long wandering around the local leather store to realize that it was going to be a well over $50 project if I wanted to stick to that plan, and I decided to change to a cheaper option. I picked up purple vynil and two packs of pyramid studs, shored up the vynil into an even and straight 4" strip, measured out where I wanted my studs (evenly spaced, two rows, with 5mm in between in each direction) and got to studding by poking a stud through in the back (where I measured out the spacing) then popping the studs in from the front and bending the arms down with jewelry pliers.  


Left to do: I wanted to save finishing this for last as fitting is tough when you seem to be growing by the day, when the time comes, I'll add more studs if need be, fold over excess vynil and adhere to back of belt, make a buckle out of craft foam (primed, painted, and sealed), use magnetic purse closure on back of belt to secure.

Scissors - I want my scissors to be both big and functional, but also light weight. I started out with a poster board mock-up, played with the handle area until I knew the joint can actually work, and then moved on to the big stuff. The mock-up was traced on to 1/2" thick foam board, then cut out with x-acto knife. Because of the nature of foam board, the degree to which I thinned down the joint area made the joint weak, so I'll be working to build it back up.


Left to do: reinforce handle area with plastic, glue, and cheesecloth, build handle out of craft foam and model magic, figure out how to make the blades both functional as scissors and separable, seal edges, coat everything in mod-podge hard coat, prime, paint, seal.

Brick Bats - Finishing these guys will likely have to wait for last, as if they're not done, the costume will still be a costume, but I got started at work on a night shift when I had a little extra time. I've picked up a few 5" "smoothfoam" balls, and I already have the eyes and mouth carved out of one, with the two connecting so I can pass wiring as necessary.

Left to do: Carve the other ball up, coat with mod podge hard coat, prime, paint and seal the bodies, line the eyes and mouth with aluminum foil then wire with clear LEDs, install semi-opaque windows painted with transparent purple paint, and add wings (likely fabric on wire frame) and ears (model magic), then suspend one over each shoulder using a webbing harness under the jacket and coat hanger wire.

Stuff yet to be started (top down) -

Wig - I ordered Arda's Vegas in Maroon (he's shown with purple hair in the anime, but in every coloured illustration by the original artist, his hair is more maroon). The plan is to sculpt the wig into his iconic 'do with a craft foam shaping substructure, using the hair fibres from the long silly tail thing to cover the foam and create a glued hairline including widow's peak and the long, thin sideburns.

Horns - I'll be making super lightweight horns using tinfoil and model magic, shaped to fit my forehead and glued on with spirit gum.

Stitches - The plan is to use the mould building latex I used to make the mould for Gaige's bolts and just painting layer on layer on a flat surface until they're built up, then gluing them on with spirit gum.

Ears - The original plan was just to order some online, but I couldn't find a pair that was both satisfactory and affordable. Soooo NOW the plan is craft foam, folded over, heat shaped and glued, then detailed with the dremel-clone, primed, painted, and attached with spirit gum.

Teeth - I'm hoping the thermoplastic I ordered from the UK will arrive in time. IF it does, I'll be making top and bottom retainers out of the thermoplastic, then gluing shaped and pointed fake nails on to make a full set of sharp teeth (I'll blunt them a little for the sake of comfort).

Jabot - I'll be using white cotton, making the neck portion clip underneath the frill, lining the frill with heavy weight fusible interfacing, and installing wire along the bottom edge of each tier to ensure it keeps its shape.

Necklace - The plan is to use two layers of 6mm craft foam with leather cord sandwiched between (with a clasp in the back), smoothing/shaping the edges with the dremel-clone, heat sealing, priming, painting with shiny purple fabric paint, and sealing.

Undershirt - I can't for the life of me find a satisfactory fishnet shirt, so I'll be making fishnet using black embroidery floss and attaching it to a white undershirt.

Gloves - I picked up some lovely black semi-stretchy material, and a pack of fake nails to sharpen and use as the under-structure for the claws. The plan is to secure wire rings to the back of each nail so they'll move properly with my fingers, and make the gloves conform to those points. At this point, the intention is to make the gloves large around the forearm (stuffed to maintain shape), and reinforce the scalloped edge with heavy weight fusible interfacing.  For the blue edging, I'll be painting on blue both as an under-colour and to stiffen the edge a little more, then embroidering over it.

Pants - These will be a touch complicated. Making a pattern using the only pair of maternity pants I own that don't have a stretchy or elastic top, I'll make the base pants, and then sew on squares of yellow fabric to make the pattern. I'll be attempting to shape the squares to give a little added perspective, but we'll see how that goes.

Boots - Because I opted for boots (cheap knee highs from Ardene, $20 on sale) rather than shoes. I'll be making two attachments for each boot, craft foam with upholstery nails for the domes, heat sealed, primed, and painted.

And that's it! Yeah, it all sounds so straightforward, but I know I'll be facing my fair share of issues and setbacks along the way. Good thing I have all week off, 'cause hot damn, there's a lot of work to be done!! Next time I'll let you know how Comiccon 2014 went, and share my Moria success (we hope)! Until then, you stay classy, internets!