 |
| For Gondor! |
Okay, so I've promised this one over and over, so I figured it was time to finally follow through - my first NON (directly) cosplay related post! That said, it's totally applicable to cosplay as well, and I can think of all kinds of applications from non-embroidered patches to the back of Claire Redfield's jacket, to the T-Shirts worn by pop-culture icons and more - really, if you have the patience, you can customize ANY piece of clothing!
As of this posting, I've used this exact technique to customize five shirts, an apron, three onesies, two stocking labels, the "R" patch for my Robin costume, the batman logo for the hubby's last minute batman costume.... So on and so forth! Imagine the gifts you can make - the perfect shirt to fit the recipient's fandom/attitude/favourite drink/favourite car/whatever they'll appreciate most - EVERY time! I'll list the base technique first, then a few advanced variations to help make any piece you might want:
You'll need:
Your design, printed or drawn, in the correct size
Paper that's waxed on only ONE side (butcher or freezer paper)
Carbon paper
A pencil
A cutting mat
An exacto knife (a cutting machine like a Cricut or Silhouette Cameo may also be useful, but I'm not that fancy)
A piece of clothing or fabric that you'd like to give a personal touch (ensure it has been machine washed/dried beforehand for pre-shrinking)
An iron and ironing board
Sponge brushes (or preferred brush type)
Then your choice of paint, either:
Fabric paint (any kind works, whether puffy, dimensional, slick, dollar store special or jacquard, just try to use all the same to avoid a texture mess)
-or-
Acrylic paint and acrylic fabric medium
For ease of writing, the instructions will be written as though butcher's paper is being used (as that's what I use) and geared towards making a shirt, but you can sub out "butcher's paper" for "freezer paper" and "shirt" for whatever you want to work with - sweatshirt, scrubs, pants, scrap fabric - as you go.
First thing, find the design you want and get it on paper. If you're going freestyle, you can draw directly on your butcher's paper (the NON wax side), otherwise you'll have to size it out on the computer, then print it in the size that you want on your shirt. Make sure you're happy with the size before you move on.
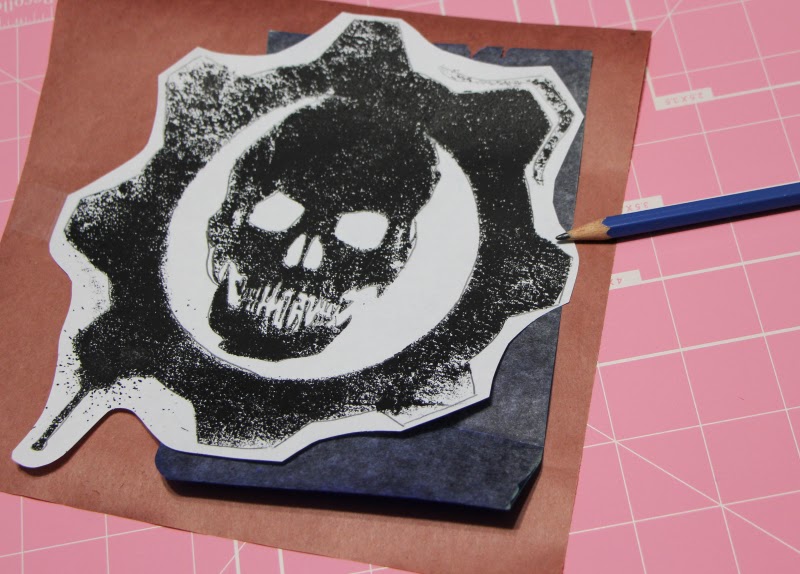 (Skip this step if you drew directly on the butcher's paper) Once you ARE happy with the size of the design, place the carbon paper on your butcher's paper, then lay the design on top, taping the corners down to the butcher's paper (the carbon paper can free-float, just make sure it's under the area you're tracing). Then trace the lines of your design with a pencil to transfer the design on to the butcher's paper, making sure you don't move the design paper once you start tracing. Make sure you get all the lines and all the details, then carefully lift the design and carbon paper to double check that the transfer is complete.
 Before you say - "why bother tracing it on if you could just tape the design to the butcher's paper and cut through both layers" - don't. I've been there, it works, but it's a pain, ESPECIALLY for anything with curvy lines or intricate details. Cutting through only the butcher's paper is much easier.
Once the design is on the butcher's paper, hit the cutting mat and cut out the design. Be careful to preserve the inside pieces of hollow shapes (like the triangles in "A"s or centers of "O"s) and keep them aside for when you apply the paper to the shirt. When finished, you should have an outline, and all the inside pieces you need - paper will cover anything that DOESN'T need colour, so any cut outs (negatives) that will need colour can be discarded.
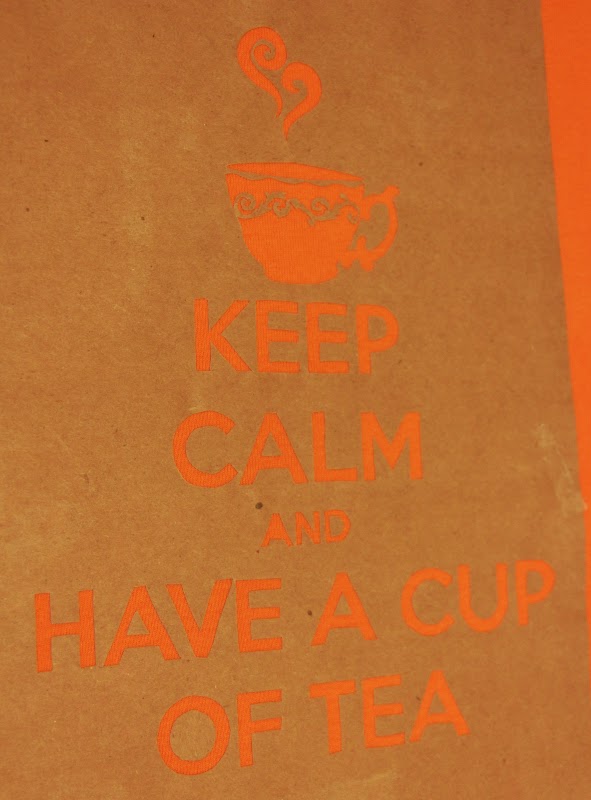 Heat up the iron, making sure steam is OFF, as steam will prevent the paper from properly adhering to the fabric. Carefully lay the outline on the shirt, paying attention to the orientation you desire (straight up and down or skewed in one direction or the other) and iron it on ensuring the paper and fabric stay flat. Carefully lay out the inside pieces, and iron them down too - be careful, as these pieces LOVE to move - feel free to iron on one at a time if you have trouble. Gently test the edges to ensure all the pieces are well adhered and re-iron pieces that are not.
Insert a flat barrier inside the shirt to prevent paint bleed-through from the side you're painting to the other side of the shirt. I usually use scrap cardboard or layers of scrap paper.
Finally - the fun part, painting! Squeeze your fabric paint into/onto whatever
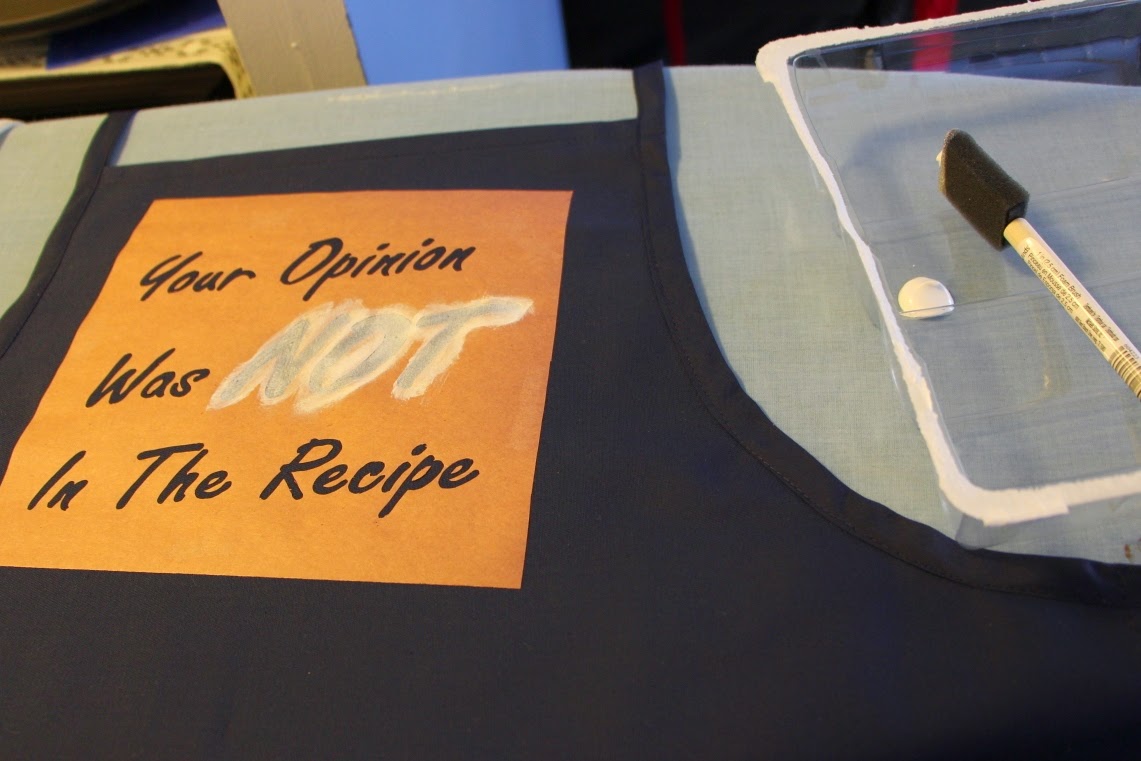 you're using as a pallete (I often use plastic containers from the recycle bin), then sponge on with the sponge brush. Make sure to take out only little bits of paint at any one time, otherwise it will dry in the palette before it's used. The first layer will take quite a bit of paint, as the paint needs to soak into the fabric fibers. Allow each coat to dry a little (15-30 min works) before applying additional layers.
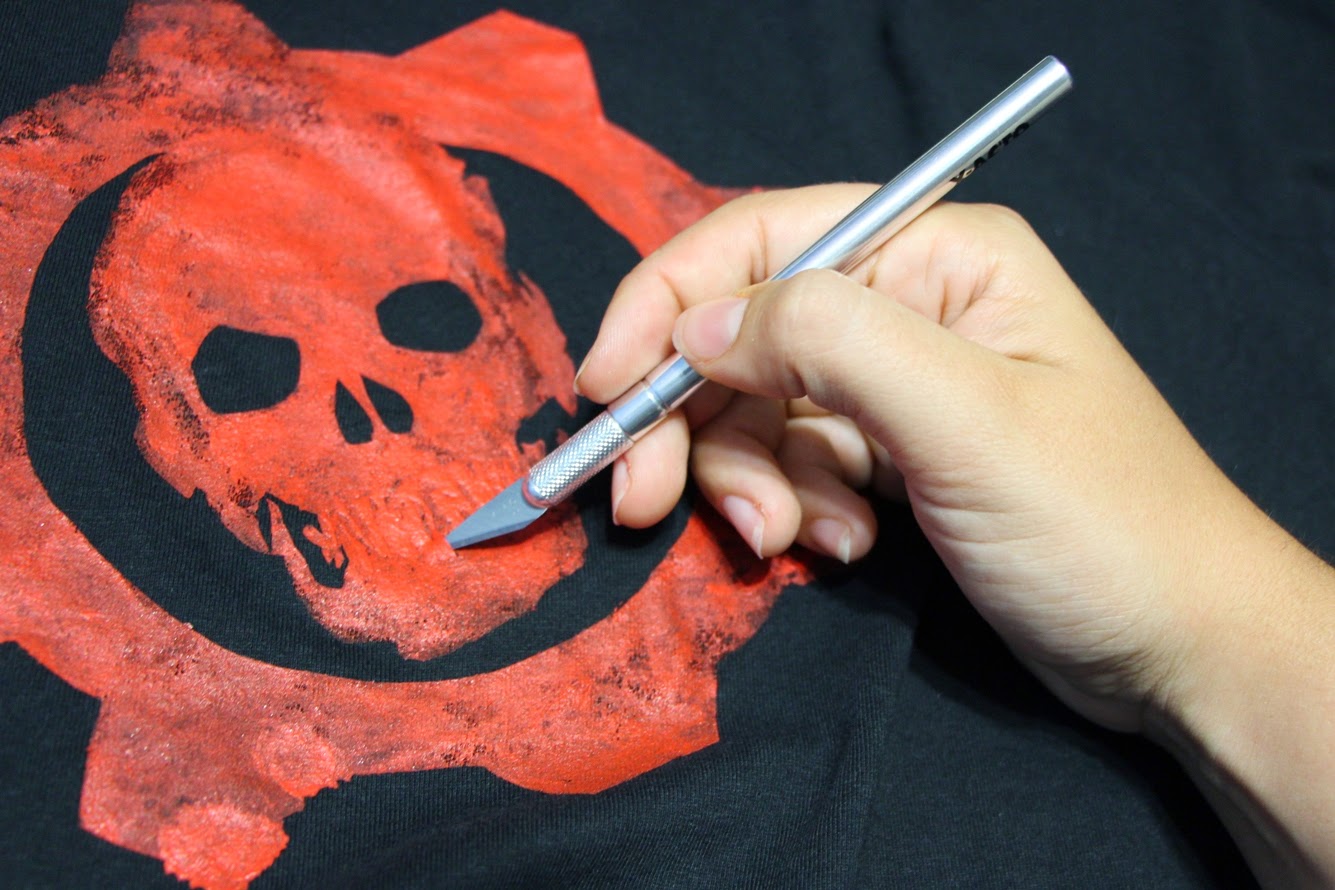 Once you've painted enough layers to be satisfied with the degree of coverage, you can remove the butcher's paper. I prefer doing so while the paint is still somewhat wet, as sometimes the design can crack a little if removing the paper while dry, just be careful not to smudge any still wet paint. Carefully remove inside pieces using the exacto knife to lift corners and peel out.
Once paint is dry (in accordance with instructions on bottle) run the iron over the painted design to heat seal. Make sure to wash shirt inside out to prevent damage to the design.
And that's the basics! The result - one unique piece of clothing!
Alternate techniques
Be warned, these are harder and/or more time consuming than the basic method, and not to be attempted by the faint of heart!
Designs with multiple colours
Some designs have multiple colours mixed in the one stencil, but others need different blocks of colour, example - the Hylian Shield has four distinct colours (silver, blue, gold/yellow and red) for which I made three seperate butcher's paper stencils.
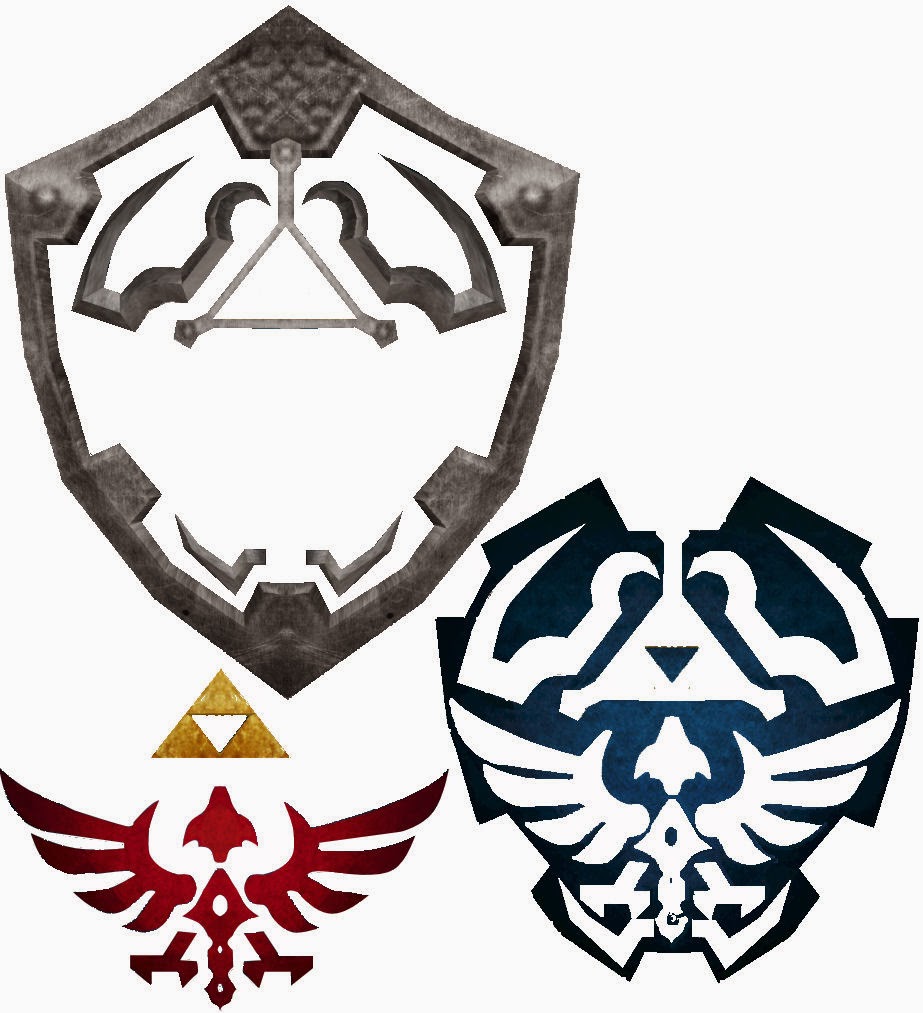 For this technique, I separated the shield into colour based "pieces" in Paintshop Pro before printing, making sure to leave some extra "blank" space between the colours (a gap of a few pixels) to keep myself from having colour overlap. I left the gold/yellow and red on the same stencil set as they're separated enough that they could be painted in without bleeding together.
The same tracing and cutting techniques as above were used to make the stencil sets.
I started with the innermost design (the triforce and bird) as I figured it would be easier to build my way out from there. Once I was satisfied with the level of coverage, had removed the butcher's paper and had allowed the paint to dry, I applied the stencil for the blue, including pieces which were ironed directly on to the red and gold/yellow paint. Once the blue was satisfactory, the stencil removed and the paint had been allowed to dry, I ironed on the silver stencil, including a piece applied over the blue, red, and gold/yellow paint, and painted in the silver. With the silver complete, I peeled off the last stencil and allowed the silver to dry.
 |
| One piece at a time! |
Another design that used multiple colours (though only one stencil) was the Grub Killer (Clayton Carmine) design I put on the back of a shirt for one of my Gears Buddies. On Carmine's armour, the "Grub Killer" and little omen appear to have been spraypainted over blood spatter, so I painted on the spatter manually (no stencil) and allowed it to dry before ironing the stencils over top - worked like a charm!
Varied/sketchy colour
Sometimes solid colour won't provide the right look. For example, for my Crimson Omen shirts, to be accurate the red has to be varied - stronger in some areas and lighter in others. This was accomplished by sponging the colour on more lightly in some areas than others, adding extra layers where the colour is more intense, and painting in veins with a paint brush. I was careful to make it as close to the original as possible. Oh, and the little splatters around the drip were added by toothpick after the fact.
Detailed Painting
Warning: You need artistic ability, lots of time (the example took me a solid two hours for painting alone, not including dry time), and various paintbrushes for this. Also, instead of the tulip style fabric paint (from tubes) acrylic paint and fabric medium were used as they're thinner and more easily mixed.
Sometimes colour blocks aren't the look you're going for - you want details, gradients, and little finagly things like that! For example, my Majora's Mask onesie just wouldn't be the same without the blending and little details.
In this technique, the butcher's paper is only used to make the outline of the design. Once the outline was made, I painted it in with several layers of white to create a smoother base for painting - if you were to paint details directly on to the shirt, the fibers would make it one heck of a mess!
Unlike in the colour block method, I left the stencil in place to prevent any of the colours from ending up on the rest of the onesie. I drew the details lightly on to the white with a pencil (I used the cut-out of the mask, folded in half then eyes cut out to ensure symmetrical eye placement) and proceeded to paint, mix, and blend the colours as necessary to create the effect I wanted.
 |
| Outline - Eye Placement - Pencil Sketched Details |
 |
| Inside Colour - Horns - Finished! |


