 |
| Looks about right! Except the paper bit... |
So I took to the internets! I searched both ebay and Etsy for round, wooden buttons (easily paintable) in the size ranges I needed, and found a couple of promising options... all of which were in Singapore, China, or Hong Kong, and not likely to arrive until AFTER con (unless I was willing to pay through the nose for express shipping which still wasn't a guarantee). I was crushed. What in the world was I going to do? How would I find a local source with EXACTLY what I wanted, or how low were my standards going to have to drop if I didn't? Hang on, the only way to get EXACTLY what I want is always the same - make it! In this case, out of polymer clay!
 |
| Buttons! |
-Polymer clay (fimo, sculpley, whatever!)
-Acrylic paints
-Gloss varnish for acrylic paints
-Circular objects of varying sizes
-Toothpicks
-Aluminum foil
-Baking sheet
 |
| Any circular thing I could find... |
 |
| Smoosh and poke! |
 |
| Smooooooosh! Oops. |
My first attempt on the smaller buttons was rolling the clay into a ball, then smooshing to make it smoosh out evenly. This was a bad idea, and the ball cracked. Just sayin'. What actually worked was smooshing, smoothing, and flattening, but I made this picture illustrating each of the six stages to SHOW how it worked:
Step one: The original disc from the cut outs
Step two: Smoosh inwards to build up the "perimeter" of the button
Step three: Smoosh the center to flatten it out and raise the perimeter further
Step four: Flatten the center with a small circular object, then smooth the perimeter
Step five: Flatten the center further with a circular object of the exact desired size
Step six: Poke four holes with toothpick
 |
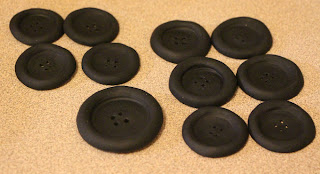
| Oven fresh, mmmmmmmMmmmmm |
 |
| Soooooooo perfect! |
Now, I may have mentioned once or twice that I might have gone a little overboard when it came to accuracy. Well, attaching the buttons was one of those places - if you look at Moxxi, there is NO thread on the buttons, and once I noticed that, the little X marks on the Moxxi cosplays I looked at bugged me greatly. I vowed - no X for me! The solution: I sewed (actually, Fatima did) on leftover buttons from the spats (I had bought a huge box of assorted buttons for the sake of not having to spend a fortune on individual packs) on where I wanted them, then used hot glue to attach the polymer clay buttons to the space holders - no strings necessary!
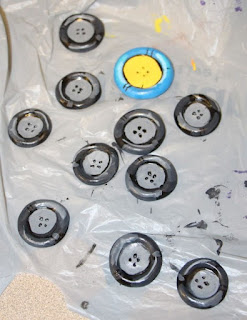
Well... I screwed up twice in that process. First, I didn't take the time to properly gauge where the buttons needed to go - attaching them was a last night, last minute gotta-get-it-done task, and I just grabbed the jacket and drew on approximate X marks for Fatima without taking the time to put the jacket on and make sure they were right. I ended up making the pattern too large, and had two of my buttons so low the belt was above them - easy fix for next wear, but after all the effort I put in to accuracy I was a little embarrased by the gaffe. Second, hot glue was NOT the right choice for attaching them (I will be using e6000 or super glue in the future). I started losing buttons before I was even out the door, and nearly lost my prize huge blue and yellow button several times over the course of the convention. At final count, I need to re-make four of the ten small buttons (three cuff and one of the below the belt) before next wear. Oh well, I'll make the ones for the spats at the same time, and then all my buttons will be the same! Success!
The buttons were a triumph! With those complete, all the jacket was missing was patches and bias tape. That said, I've been neglecting my Dr. Zed posting, so next time, we'll be talking buckles!
Need more Moxxi? My tutorials so far:
Part 1 - Spats
Part 2 - Finding Fabric and Starting the Jacket
Part 3 - Jacket continued, Stripes and Zipper
Part 4 - Cuffs and Collar


And i'm one of those people in France reading your blog! here! And I thank you immensly for putting your work up on the net, because I [who also will be cosplaying Moxxi from BL2] find very obscure the few screenshots on here outfit (the behind of her coat, the inside, even the buttons from you have noticed more than me!).
ReplyDeleteYou blog helps me find new ideas on how I will elaborate the costume (I won't be copy/pasting your creation or doing as good a costume for that matter) before this december.
So thank you very much for sharing with us around the World your project! I look foward in your next post! :D
~La Frenchy
(sorry for my english mistakes)
ReplyDeleteBonjour Mlle Frenchy, et merci beaucoup! Votre anglais est vraiment meilleur que mon français, et je vous comprenais bien!
ReplyDeleteThanks so much for commenting, and don't worry, more posts are coming! ... In a little while! I'm away on a summer contract at the moment, but come the end of the month I'll be right back to posting, and I'll do my best to share all the details well before December! Best of luck on your creation, and if you end up needing any further elaboration or help, let me know and I'll do my best to give you a hand!
-LC