Thursday 27 June 2013

Moxxi Part 6 - Patches, Patches, Patches

Miss Moxxi!
The beautiful, the barbaric, the most buxom!
Since I don't think I actually addressed this yet, I figured I'd chat a bit about why I chose the Borderlands 2 version of Moxxi for my first cosplay.  First, because I'm an idiot and looked at her thinking "Well, that doesn't look too complicated" - yeah, famous last words of many many cosplayers. Also, her costume design is awesome, quirky, and beautiful all at the same time! Anyway, I specifically chose the Borderlands 2 version not only because she was the most recent, but also because she had a much more significant role in the second game.  Don't get me wrong, I LOVE her in the Underdome (now that the statute of limitations has worn off following actually playing through the entirety of all the stages), but it was nice getting more Moxxi - especially in Mr. Torgue's Campaign of Carnage.  I freaking love that ENTIRE add on. Heh heh... "I CAN USE INNUENDO TOO. TONIGHT'S FIGHT IS BETWEEN FLYBOY AND THE VAULT HUNTER...BLOWJOBS!" *cough/giggle/snort* So Moxxi in Borderlands 2 = extra badass.  That, and I look good in purple.  Anyway, back to the matter at hand...

Moxxi's Patches
Three of five...
I fail again.  I promised buckles, but I ran out of time and had to take off for my summer contract before I could take pictures of the buckle system. Luckily, I have something I CAN address - so just like Moxxi herself, Moxxi's jacket was designed to show that it's taken a little wear over the years, and as such there were more than a few patches to make! Overlooking the fact that her purple jacket has patches in the exact same places as her red one (consistent wear?), I wanted them to be as exact as possible. In addition to the large design on her back, there are four patches of various shapes and sizes that I needed - here's how!

Materials needed:
-White paintable fabric (I used yet more of the light denim I bought for the spats)
-Fusible interfacing
-Fabric paint (I used the 3D kind for the large patch, acrylic paint and fabric medium for the rest)
-White thread

First, the design on Moxxi's back.  It took a little effort to understand and sketch out the back patch in order to get the proper proportions for the design. I worked on paper until I had it fully figured out, then moved on to fabric.  I've broken in down in illustration for anyone who may follow in my footsteps:
The Design from Moxxi's Back Patch
Trippy, I know.
I found it least complicated looking at it as a square rather than a diamond, so I worked out the design in that orientation. Basically, the blue lines form a chunky cross, then the curvy green and purple lines are drawn from inside a corner through the outside corner, and to the corner of the box. This is also the same design (though a little squished) used on her belt buckle.
The Back Patch in Progress

A Palette of Blues
Bluey!
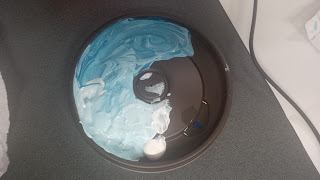
I sketched the design out in pencil directly on the fabric (as I knew I was going to be painting over it completely) then mixed up some paint in a slow gradient from white to blue so I would be able to make varying shades for the different sections.  The design itself looks like it's supposed to be shiny (with the different portions being different facets), but I just painted it as I saw it, with each section in varying shades of blue, and with a swatch of lighter "shine" through the center panel. Once all the colours were in place, I painted in the black lines to separate them, and added a black border around the outside of the design.

Moxxi's Back Patch - finished!
Not bad... My mantra became "It was just drawn that way"
What I learned from the first patch: it's much easier to make the patch first, THEN paint it. With the black going out beyond the edges of the patch area, it was difficult to shape/fold/sew the edges due to the stiffness and thickness of the paint.  Also, I ended up making it too large (in the name of "accuracy") at 15 x 15 cm or so.  Next time, I'd keep it to 12 cm or so.  Anyway, to turn the fabric into a patch, excess was trimmed, it was folded in at the edge, then fusible interfacing was sewn onto the back at the same time as sewing down the edges.  I ironed the patch directly on to the jacket, then tacked the corners down with hand stitching just in case the glue let go.  Once it was on, I painted around the edges of the patch to blend it into the jacket, and to add the "X" patterns heading out from the sides of the patch.

More Patches!
Back and Front
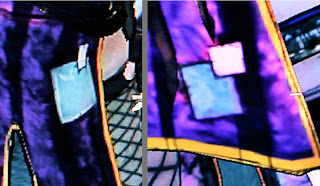
The other four patches (seen in two groupings of two) on the front and back of her jacket, were made before painting to avoid the above issues. I had originally considered making them out of fabric that matched the colour of the patch and leaving it at that, but making custom painted items to match the in-game design becomes really addicting really quickly. Just sayin'!  These too, ended up a little larger than the design called for, but worked out well enough for my tastes. Simple enough to make, cut out with 1cm seam allowance on all sides, fold under and pin on top of fusible interfacing of exact size, and sew around the outside - done!

Finished patches!
Forgot to add these at first - oops! Final product!
The interesting part was actually painting - I wanted them to be true to form, so I went in game again to get a close look at the patches - and needed to work straight from the game because photos seemed to muck up the colour too much to work from.  The patches are all different colours (pinks and blues) with variations/gradients and a black border.  By the time I got to this set of patches, I had discovered acrylic fabric medium by this point, so I was able to work with acrylics, and again, just painted them as I saw them.  Once they were dry, I ironed them in place one by one (actually, this is where I burned the hot glue from one of the ends of the tail wire! Oops.) and tacked each corner down using good old fashioned hand stitching.

Et voila! The jacket was patched up and ready to go! Because I'm away from home (and the ability to take any pictures) I won't make any promises on what will come next or when, but if I was committed enough to make the darn costumes (and you're committed enough to read about it) I WILL get all the details posted sooner or later! Come on, someone needs to know my pain!

My Moxxi-tacular Cosplay tutorials so far:
Part 1 - Spats
Part 2 - Finding Fabric and Starting the Jacket
Part 3 - Jacket continued, Stripes and Zipper
Part 4 - Cuffs and Collar
Part 5 - Buttons

1 comment:

  1. Hey there!
    I'd like to echo everyone else's comments on this series of Blogs (as much as this may seem ages ago for you now). Your in-depth coverage of what you did is so useful to anyone else cosplaying. I will be attempting to make a Moxxi costume (my first ever!) soon and I will definitely benefit from reading this, Thank you! :-)

    ReplyDelete