Showing posts with label Robin. Show all posts

Friday, 21 November 2014

Pop Expo Preview and Happy Halloween - Quick Baby Batman Tutorial!

Happy Halloween, internet!
<edit> This was written last weekend and I forgot to post it.  Ottawa Pop Expo is now TOMORROW, and the costume I wrote about at the bottom of the post is (almost) finished, and looks pretty darn good for only a week's worth of work! More later... </edit>

Hey internet peeps! Time flies when you're having fun, and damn is it ever flying - Baby Crankypants is already 4 months old! Halloween is already two weeks in the past at this point, but I had a great time getting things together for my munchkin, as in TWO costumes, one to match my Robin, and something new for Halloween AND Pop Expo - which means I need to make one so I can match her!

I'm sure it's no surprise that Halloween is my favourite holiday, eating candy, carving pumpkins into neat and intricate designs, and of course, dressing up in fun costumes - heck, it's that love of costumes that got me into cosplay in the first place! The big difference this year (aside from having someone small and cute to dress up alongside me) is that in February the hubby and I bought our first house - which means I could finally carve pumpkins and hand out candy! Another bonus with  having a house was that we have a little extra space, allowing my dear sister (remember, the one that REALLY likes Moria?) to come to the big city and look for employment opportunities not afforded in the small town where we grew up - and she's also on hand for assisting in baby wrangling and conspiring for pumpkin carving - where our mutual love of Moria took over!
Size tested!

After searching the city for a good spot to find pumpkins (the prices and sized BOTH sucked) I realized my backward logic and headed to the country - where I paid $7 for three sizable pumpkins, one of which was large enough to fit a small child (and yes, we tested this theory by plopping my daughter in it)!  Big Sis Crankypants took on the biggest of the three, doing what she does best, and drawing a lovely picture of Moria and his brick batties, then carving it out.  I tackled the other pumpkins with my dremel clone to give Moria MORE brick bats to keep him company, and voila! Pumpkins!


More pics are available at Big Sis Crankypants' Ask Moria blog
 We got great feedback from the neighbourhood residents, both young and old, though our efforts paled in comparison to the AWESOME Doom themed gourds that OTHER Big Sis Crankypants (younger than the first, but only by a matter of minutes) painstakingly dremel'd back home.
Holy effing crap they turned out awesome! Next year I wanna sculpt me some pumpkins!!

Anyway, so baby costume  #1 - big shock, a sweet little Batman to go with my Robin! It was super quick throw together for a party that was built around her Batman onesie - got a little one you want to turn into a Baby Batman?

You'll need:
-Batman onesie or plain gray onesie and materials listed here
-Long sleeve black onesie
-Black tights
-Black socks
-Black felt
-Black thread
-Black 3mm thick craft foam
-Yellow 3mm thick craft foam OR Yellow Worsted Weight Yarn AND an H8/5.00mm hook
-Scissors and/or xact-o knife

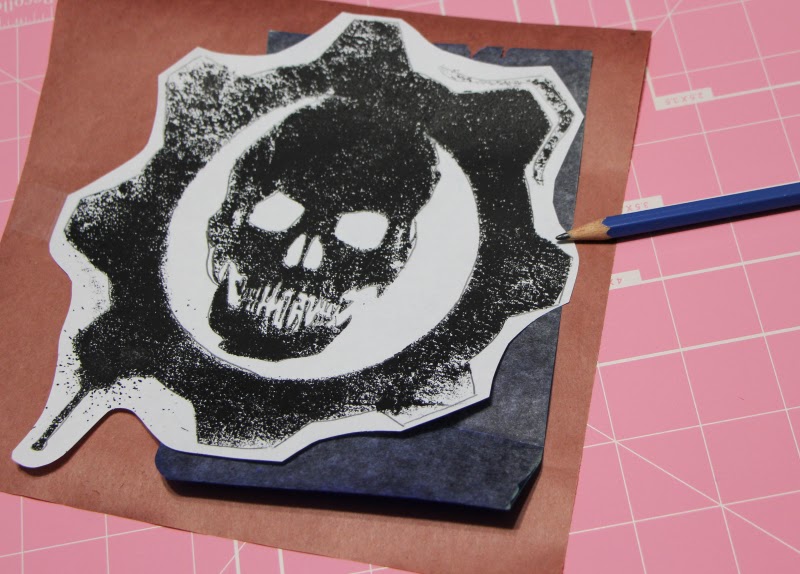
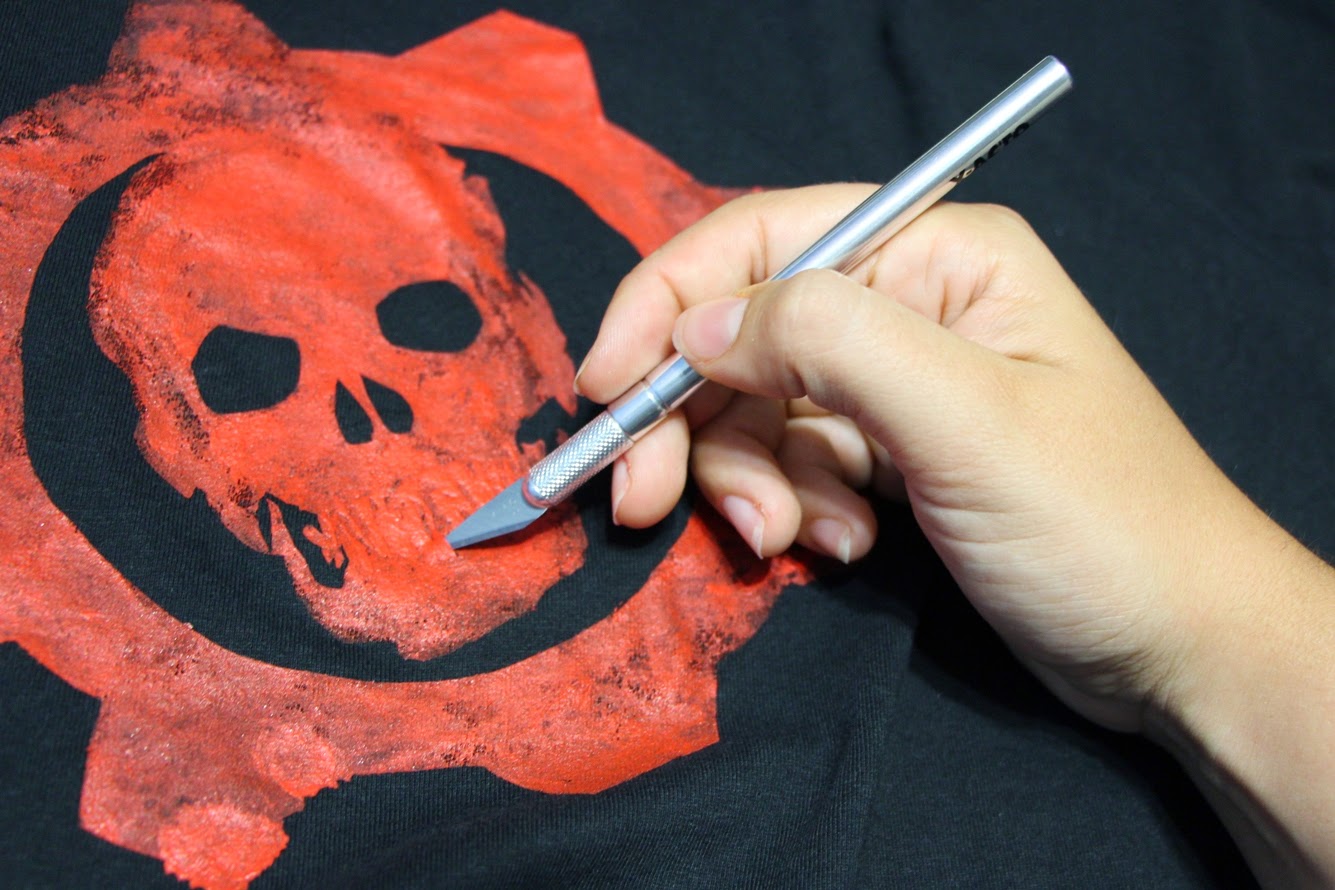
Onesie/cape - Don't have a Batman onesie (or don't feel like paying $12.99 for one)? Find a plain gray onesie and add the logo using the techniques in my tutorial to Customize Any Piece of Clothing. To make the cape, lay out the back of the onesie on a piece of bristol board and trace half of the neckline, then straight down to the desired length, throw in a few curves, and back up to the neckline diagonally. Fold the felt in half, and place the pattern on the fold, and cut out the cape! Pin in place along the back of the neckline and sew (by machine or hand) - done!

"Cowl" - Obviously a baby wouldn't be willing to wear a cowl for any extended length of time, so I made a little ear headband out of craft foam. The band was approximately 2 cm wide and 3 cm longer than the circumference of my daughter's head. One end was made into a little arrow, and a small slit was made at the other end to insert the arrow and complete the circle.  The ears were made in the correct shape with arrows just like the end of the band, and two slits were made in the right spots on the "top" of the band, and the arrows were pushed through slits! The headband stayed in place nicely AND she didn't mind wearing it one bit!

Belt - I crocheted my Baby Batman Belt, but if you don't crochet, it's easy enough to make one out of craft foam!

Craft Foam - Measure your baby's waist, and make a band in the desired width in the same manner as the band for the "cowl" above, but leave a little space as it babies are wiggly. The buckle can be cut out with an xacto knife, then slide the band through the buckle, and put the arrow through the slit around the baby's waist, then slide the buckle over the break in the band to hide the join.
Since this isn't field tested, I can't guarantee how long it will stay on for, but it should work for a photoshoot at the least, and may actually stay on well!

Crochet - Crocheted in 4 weight yarn with an H8/5.00mm hook, and totally made up as I went along - here's an approximation, but please understand I've never written a pattern before, hope it's legible:

ch - chain
sl - slip stitch
dc - double crochet
flo - front loops only

make a chain long enough to go around the munchkin's waist, then sl into first ch to make a circle

ch 2, dc in each ch around and sl into the top of the ch 2 - repeat until your belt is the desired thickness (I hit 3 rows)

The buckle gets tricky, so I made a diagram, though I'm not sure if it will help any! In each frame, the blue symbols are the current work, and the black are past work.


ch (enough to get across the belt) and sl into the bottom
ch 2 (to make first dc) and dc in each ch back across, sl into top
ch 2 and dc flo across to the desired width, cut and work in end

Attach at bottom, and repeat the same steps to complete the rectangle!

I know it's kinda wishy washy, but it allows you to customize it to the baby in question!

My widdle Dark Knight and I! FYI, she's too damn cute!
Putting it together - Probably obvious... but! Long sleeve black onesie on the bottom, then black tights (unless there's a skirt attached, like my little lady's), then the Batman onesie, followed by socks, headband, and belt! Taa-daa! You have your own little Baby Batman! To complete the look, add your own Robin costume, and voila, Parent/Baby Halloween perfection!

Off to save the princess before she can walk!
Alright, I know, what could compare? Baby Crankypants'  Pop Expo costume, dubbed Babby of Time by Big Sis Crankypants, I give you - Mini Link! I lovelovelove how this costume came together! The original concept came about when I was working on her Hylian Shield Zelda onesie back before Father's Day.  I had the template for each piece of the Hylian shield, so I cut each piece out in craft foam, intending to surprise Lord Crankypants with a mini-shield to add to his prolific collection of Zelda stuff, and for us to photograph the munchkin with during her newborn shoot!  Weeeellll, that never happened, and the pieces just sat around in my craft room waiting for a higher purpose.

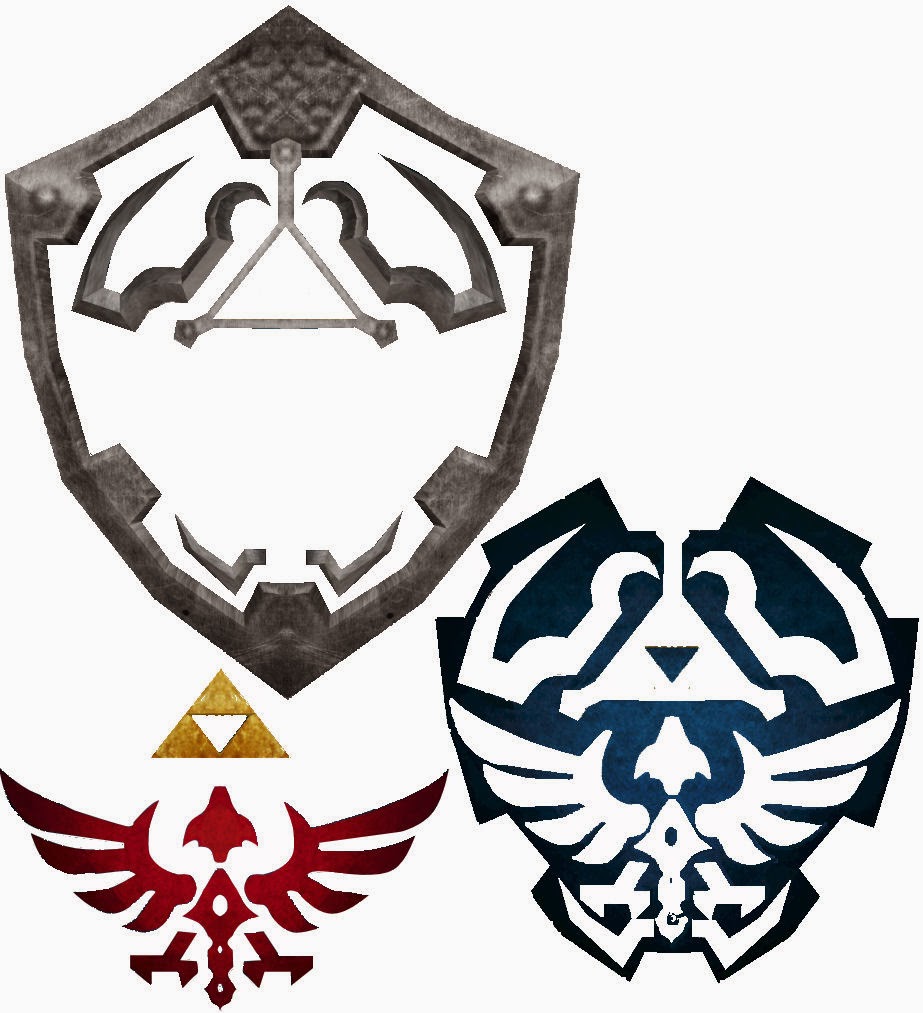
Finally, with Halloween looming I got to work! Since I had a lot of sewing to do, I put the shield together, shaped, sealed, primed and sprayed it silver, then got my sister to paint it while I worked on the rest. This is as far as I got by the Halloween engagement where we debuted our tiny Link! I'll post more about my Mini-Link and how to make your own in the future.  With Ottawa Pop Expo coming up on November 22nd, I had already given up on finding the time to finish my Gaige, so I had decided that I wouldn't worry about getting a costume together for myself... then went back and forth for a whole ten days.  This led to an inevitable identity crisis, something about being only a "Mom" and no longer the person I was before, and finally I gave in and resolved to get to work on a Zelda costume for myself! 


Zeeeeellllllddaaaaaaa!
Aside from time (well, I guess alongside time) my biggest challenge will be battling my perfectionism - I have resolved to aim for recognizable rather than perfectly accurate. I chose Twilight Princess Zelda as I was using Twilight Princess Link to model the little lady's costume after, and decided to dedicate my time to the most identifiable and unique parts of the TP Zelda version - her banner, jewelry and armour. Instead of trying to sew something together in just 12 days, I picked up two dresses, one ivory and one purple to modify, and have already tracked down some lovely long gloves. I've already sewn the banner and painted the background colours (that ombre blue/gray was a PAIN!) - now all I need is for this weekend's house guests to go home so I can get back to work! The clock's a-ticking, keep watching to see how much work I actually get done before Pop Expo!

Hope all is going well out there in internet-land and that the rest of the world had an awesome Halloween! Next time I'll post about Pop Expo and maybe share a little on how to make your very own Baby Link costume!

Monday, 13 October 2014

Tutorial - Customize ANY Piece of Clothing!

For Gondor!
Hello world!!  I know this is pretty well my customary introduction by this point, but I guess it continually amazes me that people actually take time to read my blog - so thank you for reading, and holy heck, we just topped 14000 pageviews! I know it's been a little while since my last update, but now that Baby Crankypants has moved through both the will-only-nap-on-someone phase and the will-not-nap-at-all stage, we're finally at the will-nap-on-tummy point, and she's been known to go up to THREE hours at a time (though not dependably).  With more nap time comes more handsfree time for me, and more time to get back to work on cosplay! I'm not sure how much work I'll be able to get done between now and then, but Pop Expo is coming up at the end of November (Gaige is back on the table... if time permits), and of course I NEED to put together  a Halloween costume for the little miss, so there's plenty to be getting on with!
Okay, so I've promised this one over and over, so I figured it was time to finally follow through - my first NON (directly) cosplay related post! That said, it's totally applicable to cosplay as well, and I can think of all kinds of applications from non-embroidered patches to the back of Claire Redfield's jacket, to the T-Shirts worn by pop-culture icons and more - really, if you have the patience, you can customize ANY piece of clothing!

As of this posting, I've used this exact technique to customize five shirts, an apron, three onesies, two stocking labels, the "R" patch for my Robin costume, the batman logo for the hubby's last minute batman costume.... So on and so forth! Imagine the gifts you can make - the perfect shirt to fit the recipient's fandom/attitude/favourite drink/favourite car/whatever they'll appreciate most - EVERY time! I'll list the base technique first, then a few advanced variations to help make any piece you might want:

You'll need:
Your design, printed or drawn, in the correct size
Paper that's waxed on only ONE side (butcher or freezer paper)
Carbon paper
A pencil
A cutting mat
An exacto knife (a cutting machine like a Cricut or Silhouette Cameo may also be useful, but I'm not that fancy)
A piece of clothing or fabric that you'd like to give a personal touch (ensure it has been machine washed/dried beforehand for pre-shrinking)
An iron and ironing board
Sponge brushes (or preferred brush type)

Then your choice of paint, either:
Fabric paint (any kind works, whether puffy, dimensional, slick, dollar store special or jacquard, just try to use all the same to avoid a texture mess)
-or-
Acrylic paint and acrylic fabric medium

For ease of writing, the instructions will be written as though butcher's paper is being used (as that's what I use) and geared towards making a shirt, but you can sub out "butcher's paper" for "freezer paper" and "shirt" for whatever you want to work with - sweatshirt, scrubs, pants, scrap fabric - as you go.

First thing, find the design you want and get it on paper. If you're going freestyle, you can draw directly on your butcher's paper (the NON wax side), otherwise you'll have to size it out on the computer, then print it in the size that you want on your shirt. Make sure you're happy with the size before you move on.

(Skip this step if you drew directly on the butcher's paper) Once you ARE happy with the size of the design, place the carbon paper on your butcher's paper, then lay the design on top, taping the corners down to the butcher's paper (the carbon paper can free-float, just make sure it's under the area you're tracing).  Then trace the lines of your design with a pencil to transfer the design on to the butcher's paper, making sure you don't move the design paper once you start tracing. Make sure you get all the lines and all the details, then carefully lift the design and carbon paper to double check that the transfer is complete.

Before you say - "why bother tracing it on if you could just tape the design to the butcher's paper and cut through both layers" - don't. I've been there, it works, but it's a pain, ESPECIALLY for anything with curvy lines or intricate details. Cutting through only the butcher's paper is much easier.

Once the design is on the butcher's paper, hit the cutting mat and cut out the design. Be careful to preserve the inside pieces of hollow shapes (like the triangles in "A"s or centers of "O"s) and keep them aside for when you apply the paper to the shirt. When finished, you should have an outline, and all the inside pieces you need - paper will cover anything that DOESN'T need colour, so any cut outs (negatives) that will need colour can be discarded.

Heat up the iron, making sure steam is OFF, as steam will prevent the paper from properly adhering to the fabric.  Carefully lay the outline on the shirt, paying attention to the orientation you desire (straight up and down or skewed in one direction or the other) and iron it on ensuring the paper and fabric stay flat. Carefully lay out the inside pieces, and iron them down too - be careful, as these pieces LOVE to move - feel free to iron on one at a time if you have trouble. Gently test the edges to ensure all the pieces are well adhered and re-iron pieces that are not.

Insert a flat barrier inside the shirt to prevent paint bleed-through from the side you're painting to the other side of the shirt. I usually use scrap cardboard or layers of scrap paper.


Finally - the fun part, painting! Squeeze your fabric paint into/onto whatever you're using as a pallete (I often use plastic containers from the recycle bin), then sponge on with the sponge brush. Make sure to take out only little bits of paint at any one time, otherwise it will dry in the palette before it's used. The first layer will take quite a bit of paint, as the paint needs to soak into the fabric fibers. Allow each coat to dry a little (15-30 min works) before applying additional layers.
Once you've painted enough layers to be satisfied with the degree of coverage, you can remove the butcher's paper.  I prefer doing so while the paint is still somewhat wet, as sometimes the design can crack a little if removing the paper while dry, just be careful not to smudge any still wet paint. Carefully remove inside pieces using the exacto knife to lift corners and peel out.

Once paint is dry (in accordance with instructions on bottle) run the iron over the painted design to heat seal. Make sure to wash shirt inside out to prevent damage to the design.

And that's the basics! The result - one unique piece of clothing!

Alternate techniques


Be warned, these are harder and/or more time consuming than the basic method, and not to be attempted by the faint of heart!

Designs with multiple colours

Some designs have multiple colours mixed in the one stencil, but others need different blocks of colour, example - the Hylian Shield has four distinct colours (silver, blue, gold/yellow and red) for which I made three seperate butcher's paper stencils.

For this technique, I separated the shield into colour based "pieces" in Paintshop Pro before printing, making sure to leave some extra "blank" space between the colours (a gap of a few pixels) to keep myself from having colour overlap. I left the gold/yellow and red on the same stencil set as they're separated enough that they could be painted in without bleeding together.

The same tracing and cutting techniques as above were used to make the stencil sets.

I started with the innermost design (the triforce and bird) as I figured it would be easier to build my way out from there. Once I was satisfied with the level of coverage, had removed the butcher's paper and had allowed the paint to dry, I applied the stencil for the blue, including pieces which were ironed directly on to the red and gold/yellow paint. Once the blue was satisfactory, the stencil removed and the paint had been allowed to dry, I ironed on the silver stencil, including a piece applied over the blue, red, and gold/yellow paint, and painted in the silver.  With the silver complete, I peeled off the last stencil and allowed the silver to dry.


Hylian Shield
One piece at a time!
Finally, for added dimension, I used my silver paint tube (designed to be used as a writer) to add the rivets and lines on the "metal" pieces to make the shield really "pop!"

Another design that used multiple colours (though only one stencil) was the Grub Killer (Clayton Carmine) design I put on the back of a shirt for one of my Gears Buddies.  On Carmine's armour, the "Grub Killer" and little omen appear to have been spraypainted over blood spatter, so I painted on the spatter manually (no stencil) and allowed it to dry before ironing the stencils over top - worked like a charm!
  
Varied/sketchy colour

Sometimes solid colour won't provide the right look. For example, for my Crimson Omen shirts, to be accurate the red has to be varied - stronger in some areas and lighter in others. This was accomplished by sponging the colour on more lightly in some areas than others, adding extra layers where the colour is more intense, and painting in veins with a paint brush. I was careful to make it as close to the original as possible. Oh, and the little splatters around the drip were added by toothpick after the fact.


Detailed Painting

Warning: You need artistic ability, lots of time (the example took me a solid two hours for painting alone, not including dry time), and various paintbrushes for this. Also, instead of the tulip style fabric paint (from tubes) acrylic paint and fabric medium were used as they're thinner and more easily mixed.

Sometimes colour blocks aren't the look you're going for - you want details, gradients, and little finagly things like that!  For example, my Majora's Mask onesie just wouldn't be the same without the blending and little details.

In this technique, the butcher's paper is only used to make the outline of the design.  Once the outline was made, I painted it in with several layers of white to create a smoother base for painting - if you were to paint details directly on to the shirt, the fibers would make it one heck of a mess!

Unlike in the colour block method, I left the stencil in place to prevent any of the colours from ending up on the rest of the onesie. I drew the details lightly on to the white with a pencil (I used the cut-out of the mask, folded in half then eyes cut out to ensure symmetrical eye placement) and proceeded to paint, mix, and blend the colours as necessary to create the effect I wanted.

Majora's Mask Outline
Outline - Eye Placement - Pencil Sketched Details
Once everything was painted in as I wanted it, I removed the stencil.  Finally, to add some dimension I used my black fabric paint writer to outline the eyes, et voila! Perfect MM onesie! I'm not sure how well it will wash (I'm a little worried, but won't even try it 'till our little lady has worn it at least once) but I'll report back when I know!
Majora's Mask Colouring
Inside Colour - Horns - Finished!
So voila! Think of the possibilities! Fun, geeky shirts for less than a fortune! Personalized gifts for ANYONE! Customized shirts/costume pieces/patches for your favourite characters! I love this technique, and just can't get enough of it! PLEASE, if you use it to make something awesome, let me know, either by email - lady.crankypants@gmail.com, or by posting it up on my facebook page - http://www.facebook.com/crankypantscosplay! No promises on timeline between now and next post (I'd probably break it anyway) but rest assured I'll let you know how my Halloween costuming goes, and there will surely be some adorable pictures involved!  Until next time, you stay classy, internets!

Tuesday, 18 March 2014

Ottawa Pop Expo Con Report!

Hello world, Happy New Year! I know, I vanished for a little while, half because I'm a slacker, and half because I've been busy. Really busy.  Like, stressed out over Gaige, bought a house, spent two weeks with family for Christmas and New Years, oh, and worked on making a human being.  That's a lot of hard work all at the same time ladies and gents! But more on that later... in the meantime, I just have to say thank you! In spite of a complete lack of posting on my part, there have been people visiting on a regular basis, to the point that this lil ol' blog is well over 4500 pageviews - awesome! I hope my work helps other cosplayers or aspiring cosplayers out there, or at least exposes curious parties to just how much work is involved in what cosplayers do (hint: one heck of a lot!).

Alright, so I worked my butt off on Gaige over the entire month of November, but I kept being knocked on my backside by some mystery illness (which turned out to be "morning" sickness, which should really be called any damn time of day sickness) and found it SO hard to concentrate and get work done when I wasn't feeling well.  I DID get a lot of work finished, but at the end of the road, I found myself with more things left to do than time to do it in.  It was heart crushing (especially as I knew I wouldn't get another chance to wear Gaige for a LONG time... Like, probably NEXT Pop Expo) but as of 6:00 pm the night before the convention when I had to meet my partner in crime at the venue and set up our table in Artist's Alley, I was forced to admit defeat. Even if I worked all night, I STILL wouldn't have finished, and even if I did, I wouldn't be happy with the quality of work - so I set to work getting Moxxi back to con-ready. I'll share my Gaige progress next post.
New buttons and MORE new buttons!

I really didn't have much time, so I wasn't able to address every issue I meant to, so I fixed what I COULD address. I made new buttons to replace those which had fallen off over Comiccon, and made eight MORE more buttons for the spats, moved the under-buttons on the jacket up, and glued the lot on with e6000, which was a resounding success, and I didn't lose a single button this wear. Also, the bias tape had pulled away from the fabric a little over the zipper on the front of the jacket, so I undid the stitching and sewed it back in place. Finally, I reinforced the closure over the cleavage with velcro, because while the snaps DID work, they didn't hold everything in place tightly enough, and in some pics could even be seen - the velcro was MUCH more secure.  Another aspect which was much more secure on this wear was the hair, which I chopped off at Halloween, making the curling process much easier and with the nice, dry, crisp December weather, the curl held no problem!

So - Ottawa Pop Expo! This was my second ever convention, and the first where I had a table in
Meghan and I at our table!
Artist's Alley. Having an artist's pass was nice, as it gave me early admission, though it also meant I was glued to our table most of the day. Overall the general set-up and atmosphere was the same as Ottawa Comiccon, which is unsurprising considering it's run by the same people. The main differences were that it was meant to both be a smaller con, and to have a broader focus than Comiccon. The "smaller" meant the celebrities booked were notably more "B List" than Comiccon - still a lot of good names on the bill (Tom Felton, Sylvester McCoy and Norman Reedus were the biggest draw as far as I could tell), but fewer "big" stars. The only thing that I really saw showing a "broader focus" was the inclusion of WWE wrestlers on the celeb bill (Brett Hart and Honkey Tonk Man), and the addition of a wrestling ring where Capital City Championship Combat had fights going throughout the weekend, scaring the crap out of anyone who couldn't see the ring with loud thumps and bangs at irregular intervals. We had the dubious pleasure of being able to hear the proceedings clearly, but weren't actually able to see what was going on - the first few bangs were somewhat distressing, from there it just became annoying.


Creative shot at the table by a photographer at a local paper
Having a table meant I spent a LOT less time wandering and checking things out, and a lot more time tied to the table, but I did make sure to get out SOME of the time, as what fun is looking fab if no one gets to see you? I wore Moxxi on the Saturday, and had a grand old time wandering about, garnering quite a bit of attention along the way. Sadly, I only found two other Borderlands cosplayers all weekend - a Maya I had seen at Comiccon on the Saturday, and a female psycho on the Sunday. My big goal for
A fabulous Maya and I!
the day was to be a little more "Moxxiish" in any photo ops, as at Comiccon, I had a tendency to pose pretty well like I would for normal, costume free photos, complete with big fat grin.  This time I tried to execute the signature Moxxi half-smile, and her one hand on the waist, hip popped stance.  It didn't work every time (some of the photos were a little less than flattering) but I ended up with some pretty awesome photos out of those I found! Oh, and the hubby decided NOT to dress up this time, so he just wandered around in gaming shirts all weekend. On Sunday I really didn't feel like putting the time into getting gussied up, so I just wore my Robin costume.  It didn't have nearly the attention draw that Moxxi does (it's much less elaborate, and...uh.. doesn't show off my assets in the same way), but I did get a few photo requests along the way!


https://www.facebook.com/photo.php?fbid=245211658936216&set=a.245211068936275.1073741837.187664698024246&type=3&theater
Lovely shot from Geek Chic Elite!
Another addition to my weekend was actually bringing my big fancy expensive camera, and taking pictures of people with it! I didn't cart it around the con the whole time (I don't like having to hide it during photos) but having the option to take pictures at the table at least was great!  I didn't take nearly as many as I thought I would, but I did stop the odd cosplayer as they passed the table, and took some pics during panels and the masquerade. For the full album, pop on over to my Facebook page - http://www.facebook.com/crankypantscosplay

Something I actually took the time to do this go around was check out a few panels! There wasn't as much variety as there was for Comiccon, but a couple DID catch my eye, namely those concerning Cosplay! The first one I checked out was "Prop Building for Beginners" which promised to give tips for both beginners and more seasoned cosplayers, as well as discussing budgeting and pitfalls to avoid. What the brochure failed to
Jessica Nigri and Monika Lee's panel!
mention, was that this panel was being put on by the Capital City Garrison of the 501st, meaning it was really Star Wars Costuming 101. I'll admit, it was VERY interesting, and I learned a lot, but as I'm not planning on doing any Star Wars costumes any time soon (if ever) it would have been nice to know what I was getting into in advance.  The second panel I checked out was a Cosplay Tips panel with "celebrity cosplayers" Jessica Nigri and Monika Lee.  As I assumed beforehand it was less a panel and more a Q&A session, it was nice to actually hear these ladies speak in person (you never know what to think with the editing that goes into TV appearances), and it was nice to be able to ask a question or two.

The retail offerings were very similar to Comiccon, though a few of the larger traveling retailers like the Tower of T-Shirts were absent, there was still a lot of swag to be had.  That said, I spent a grand total of $3 on non-food purchases, $1 on a super-cute prinny magnet for my sisters, and $2 on a set of three buttons, two Fallout related, one Zelda related. The hubby pulled in a much larger haul on the other hand, picking up a set of Battlestar Galactica coasters, two Zelda Shirts, an Office shirt, and a full set of the "Batman - A Death In The Family" story arc comics.

The Masquerade was pretty awesome, I'm not sure if it was just because Heroes of Cosplay crew were going to be there filming, but there seemed to be a lot more entries that fit into the top end of the spectrum than there were at Ottawa Comiccon - huge, intricate, beautiful costumes, and not just from the "Heroes." Having the film crew on scene only caused a little bit of disturbance in the the overall show - first, when the whole thing had to be re-started after filming didn't catch the intros correctly, and then at the end, when everyone was implored to stick around for an extra 20 min or so in order for the judges to deliberate and for the "big prize" winners to be announced that night.  The silence was filled in by a bit of a Dr. Who sideshow with various Daleks and a Doctor taking the stage along with the ninjas for much mayhem and more than a little extermination. The following day I took the time to chat with one of the judges, who assured me that even backstage everything went pretty smoothly with the Heroes crew, and the only disturbances were from the camera crew wanting to do multiple takes of their people from time to time on their way through the green room.

Speaking of Heroes of Cosplay, not only were their masquerade costumes fantastic (small surprise... it's pretty well their job) but I ran into Jesse Lagers out and about around closing time on Sunday.  I'd seen him earlier that day, but wasn't interested in chatting with him while the camera crew was in tow.  I can't say I'm the biggest fan of the show (mostly due to the added drama) but I have a lot of respect for the skills of the cosplayers involved, and Jesse is one of my favourites, so it was great to get a chance to chat with him! He was super down to earth, and more than willing to answer all my silly questions about how the show operates behind the scenes and niggly little cosplay construction details - bonus, he says they at least spent more time filming construction stuff so far this season, so hopefully we'll get to see some more of the good stuff!
Ermahgerd! Jersseh Lergers! Such a chill guy!

Overall, Pop Expo was a great experience, both as an "Artist," and as an attendee.  There was some grumbling from other exhibitors about the size of the crowd (markedly smaller than Comiccon) and suggestions that the con organizers were stripping all the attendees of their spending cash by offering photo ops etc. right at the door, but really I had a decent weekend in spite of the fact that I didn't take the time I really should have to make more geeky jewelry as I had planned to in the run up to the con (I was too busy panicking about getting Gaige finished), so I'm sure it wasn't a systematic ploy on behalf of the organizers. I had a great time wearing Moxxi again, and catching up with the cosplay contacts I had made at/after Comiccon. I still regret not finishing Gaige in time, but I guess it's just a lesson in time management - starting early is great, but spending months on props won't do any good if you don't finish the actual costume.

Next time, I'll talk about the work I DID get done on Gaige, and I'll share my plans for Ottawa Comiccon, which I will be attending while 7 months pregnant - I'm SUPER stoked to get started on this costume, guys! Until next time, you stay classy, internet!

Friday, 8 November 2013

Ottawa Comiccon Convention Report!

Hey peeps, welcome and thanks again for reading! I know it's still less than peanuts in internet land, but I'm OVER 2000 PAGEVIEWS! It's just nice to know that there are people out there reading my work. I had extra traffic over the last month, but I'm pretty sure it was just Halloween costume advice hunters - hey, if you pulled one off, let me know and send some pics, I wanna see them! lady.crankypants@gmail.com


After the race - we did it!
So the Rattle Me Bones race went well! I managed to scrape together the hubby's Batman costume, the cowl was far from perfect, but he was totally recognizable, which is the best I could do with two days notice (working 12h of each of those days, no less). I had a blast running in costume, though the cold took its toll (especially when the wind picked up and rain got started), and having people actually cheer me on by name was a bonus (you know, because my name IS Robin). I surpassed my fundraising goal by a generous amount - $334.50 total! And in the end, I finished in 1:14, which was a little disappointing, first because my goal was 1:10, and second because a few minutes after crossing the finish line I saw the clock was at 1:13, so I thought I had made it! My only consolation was that when I mapped the run after the fact, I discovered that the race route was actually 10.43km.  Oh well, at the end of the day, all I can do is train to do better next time! Speaking of next time, we signed up for another half marathon for next May - yes, I'm crazy, but it's that much more motivation to keep up my running and get into better shape!

So this is where I was going to post all about my progress, but I have a LOT to talk about, so I'm going to keep that for my next post, otherwise I'll end up being over 5000 words! I'm definitely not even close to being finished, but I have been working hard!


How easily distracted am I? Back on track with my Ottawa Comiccon Con Report - disclaimer: this WILL be photo heavy, and almost none of them are mine, but I will be linking directly to the source where possible. If I posted one of your photos and you would like it taken down, please let me know by email.


So it was a drizzly May day when at 6:00am I rolled out of bed to whip myself into shape to hit my first ever convention. This was OCC's second year, though I had missed last year's convention as I was out of town for a wedding. We decided to go on the Saturday in case we were able to get in on the masquerade, and because I wasn't available for the whole weekend, and Saturday is usually the most action packed.  I had been up to at least 2:00am finishing up last minute this and thats for my Moxxi costume, so I was thankful that I had full face makeup to cover my icky eye bags from not sleeping enough.  By the time I finished putting the finishing touches on my face, the hubby had rolled out of bed and was slowly pulling his costume together. We headed out nice and early (around 8:00am), doors opened at 10:00am, but last year the hubby had arrived only one hour early, and the lineup had been WAAAAAY around the side of the building in the sweltering sun and heat, so we wanted to beat the worst of it. Thankfully, this year the organizers had the forethought to set out a large tent with snaking line to keep everyone out of the drizzle and protected from any sun which may have decided to shine on us.


First photo of the day - Courtesy of Shadoswipe
The wait wasn't too bad, we were able to get a look at several awesome costumes along the way, and chatted with a nice brony and his cousin who were in line behind us while I did my nails. Being out of the drizzle was nice (even though my hair was already ruined) and by the time we made it inside the precipitation had cleared and it was just cloudy.


Ambushed in line by the photog for Audrey's
Inside the convention it was CROWDED, there were so many people, and apparently a lot of Borderlands fans, as the hubby and I were stopped just about every five steps by people wanting to take our picture. Our first stop was the Masquerade table, I had been considering pre-registering, but wasn't sure the costumes would be finished in time. I wasn't too hopeful as we came up to the table (the website had made it sound like space was very limited and VIP pass holders had been in for an extra hour already) but there were plenty of spaces open, and the masquerade staff were super helpful in getting our background music ("Ain't No Rest for the Wicked" by Cage the Elephant of course) off my phone and on to their computer in spite of the strict "bring your own CD" rules on the website (remember, I wasn't sure there would be space left, so I hadn't bothered making a CD). Once we were all signed up, we wandered!


Like this!
The exhibitor area was well set up with decent sized aisles and a LOT of businesses and artists to check out. We wandered slowly through the tables looking at this and that. The hubby collects various action figures and memorabilia from his favourite video games, so we had plenty to peruse for all the toy/comic shop booths, and we had a solid look through all the t-shirt vendors stuff as well looking for shirts that met our criteria - we both love showing off our video game love, but hate shirts that literally have the name of the video game plastered all over it. On our second walk through, he ended up picking up a fab Bioshock Infinite Songbird shirt we'd seen on the first pass but wanted to check out the competition before committing. They also had a pretty sweet skyhook shirt he had wanted, but they were all out of his size.

I was overwhelmed by the awesome stuff available in Artist's Alley, the level of craftsmanship from many of

Badass TF2 Group - Awesome Photo by Jason Walton
the artists, awesome steampunk stuff, neat prints, and all kinds of different jewelry and accessories! Some of the best things along the way were the legitimate armour display, the steampunk society's booth (and the awesomely costumed people within), the 501st display with all their amazing replicas, seeing the original Batmobile, the badass group of TF2 cosplayers we kept running into, an enormous collection of Daleks (I'm not even a Whovian, they're just super neat!), and just all the amazing costumes and people along the way. In the end I didn't actually end up buying anything, I just soaked it all in while random people stopped us to take pictures - it happened all the time, like every five steps, all over the place, way more than I anticipated. Heck, there were even points where we ended up stopping traffic because one person would ask for a shot, and suddenly five more jumped in to get their own. Considering the fact that the hubby hates having his pic taken, he was a great sport about all of it, and only snapped twice, once while the party requesting the photo was being super impatient while he was in the process of paying for something, and once when we had just gotten lunch and were clearly out of character and carrying food. We picked up lunch at one of the little café things built into the venue, chicken sandwiches (with real chicken breast), cactus chips, and an iced tea which came to about $15 if I recall correctly, which is really not bad for event food.


Sad blurry/off angle pics!
Dr. Zed stole a buzzaxe
After lunch we were wandering again when we ran into a few members of one of the Borderlands groups that had been floating about (we'd locked eyes, waved, winked etc. each time we passed eachother before that point), and they latched on to us saying they had a few MORE Borderlands cosplayers gathered, and were trying to do a group shot. So we followed along and got a massive picture of the group of us (Hubby and I, Lilith, Gaige, Maya (Zeveelia), Salvador, Axton, Roland, Jack, Daisy (Demelaa), another Dr. Zed, Tannis (Ailyse), and a psycho). Sadly, despite the fact that I SAW a few people with decent SLRs in the HUGE CROWD of people who gathered to get a shot of our awesome looking group, I only found blurry pics and crappy angle pics (sad face). If you happened to be at Ottawa Comiccon and caught a picture of our Borderlands group, PLEASE let me know. That said, I made my first few cosplay "contacts" through the group (Maya and Daisy are now Lilith and Tiny Tina), and we're looking at doing a Borderlands group photoshoot with a proper photographer at the next OCC if I don't have to work the whole weekend.
Better look at some of the awesome peeps! Not sure where I found the first, others at http://www.digitallounge.ca!
Shortly after that, it was time to head to the green room for Masquerade prep, photos, and pre-judging! Being my first con, first cosplay, and first masquerade, I was totally unprepared for a few things. Firstly, we were told to report to the green room for 3:30pm, but weren't aware that once there, we were unable to leave. If we had known this in advance, we would have brought some snacks and diversions along - oh well, the things you learn! The Den Parents were really nice and great sources of information and inspiration, and the photographer (Jocelyn/Belziir Photography) was really nice and professional, and did a fantastic job considering he wasn't permitted to use flash due to the green room being backstage from the main panels. While we waited we were able to listen in on the stuff going on onstage (the Burt Ward/Julie Newmar panel was going on when we first arrived, followed by Michael Shanks, who is awesome). The sound wasn't great, but it was still nice. We also chatted with a bunch of the cosplayers who were waiting, some who we'd met in line, others who were stuck sitting by us, and one who I discovered afterward I'd seen posting on Coscom!
Amazing shots from Belziir! Get a closer look over on my dA - http://ladycrankypants.deviantart.com
I also borrowed a hot glue gun from a Jackie Estacado cosplayer during this time to fix my belt buckle, which had come loose, and before that even, I owe a big thankyou to the ladies at the Audrey's Costume Castle booth for gifting me with the duct tape necessary to save my beautiful big blue and yellow button, which kept trying to fall off.

Pre-judging was a little nerve wracking, as I was not sure what to expect, so when I was asked the question "what did you make" I verbally vomited the contents of my last 21 days and explained almost every detail in about 25 seconds. I'm sure I missed important things, but the judges (Melting Mirror, Suzie of Suki Cosplay, and Lucy of Cats_Luna Cosplay) seemed impressed enough, and we found out the next day that our costumes were selected for a Craftsmanship Award for "Best Use of Paint!" Because by now you should know my philosophy - if it isn't perfect, PAINT THE CRAP OUT OF IT!


We were given a brief explanation of the process (waiting points, time limits, introductions/music) before a quick stage walkthrough (not practice, just walk across the stage, observe the best lighting points, see the clock that will be counting down) and then left to our own devices again as the crowd filed into the room. Since I had previously had no idea what a "walk on" really was, or that there was a 30 second time limit involved, the hubby and I took this time to establish a general strategy and discussed possible poses, actions, etc. In the end, 30 seconds feels like FOREVER when you're up there, but passes in no time at all while watching, and after I found a video posted months later (thank you Robert Christian!), I was pretty satisfied with the outcome!


Feel free to watch the whole thing, but we're on from 11:07 to 11:49

The masquerade itself ran pretty smoothly, we were able to watch on the monitors
From Just Push Play - Makes me giggle every time!
backstage until our den was on deck, then moved through the waiting stages until it was our turn.  I really enjoyed watching everyone else, seeing what they came up with for their walk ons and skits, and checking out the different stage techniques, and had an AWESOME time on stage strutting around and exuding as much Moxxi attitude as I could manage! As soon as we finished, that was it - we were hungry and tired, and as much as I wanted to stick around to watch the rest of the show, people said the video would be posted online (so I could see it anyway), the hubby was done, and we were out!


Some things I didn't take advantage of were any of the panels we weren't backstage for (I didn't take the time to plan in advance as Julian said they were never able to get in last year). I managed to catch the Jewel Staite panel with Nathan Fillion and Summer Glau (via Skype) on Youtube courtesy of Con Junkies (before all the panel videos were pulled down for legal reasons), which was awesome.  Next year I plan on having a pre-orchestrated list of panels I mean to attend, and boo to the hubby if he doesn't want to come with. We also didn't do ANY of the photo ops or signature things as I didn't feel like spending money just to meet a celebrity (even though there were some pretty awesome people available). I might consider it next year if there's anyone I just can't resist, but I can't think of anyone specicfic off the top of my head.

From http://www.digitallounge.ca
Our pair shot from the photo booth - love it!

Overall, Ottawa Comiccon was an awesome experience, and I'm definitely looking forward to OCC 2014, especially if the costumes I have planned come to reality. The convention felt well organized, the masquerade ran smoothly, and the exhibitors were awesome.  My ONLY complaint (aside from the crowding, but that's just the way a large event with a big draw works) was that we never got the certificate from our masquerade award, even though we were told it would be mailed if we couldn't make the awards ceremony (which we couldn't, as I was working on the Sunday). I've sent emails, but never heard anything back. For my first time in cosplay I had a fantastic time, and was really overwhelmed with all the positive feedback from the people we met along the way, and ALL THE PICTURES - SO many people asked us, and it was a lot of fun scouring the internets looking for decent snaps of us. I think my final total found was about 40 (not all awesome, but all pictures of us) though I'm certain there are more floating out there somewhere (if not in some dusty corner of someone's hard drive or SD card).


Voila, that ends the saga of Moxxi, Dr. Zed, and Ottawa Comiccon 2013! Sooner or later I'll be updating Moxxi for a proper photoshoot, but Gaige is kinda drawing all my attention at the moment (ERMAHGERD ERNLEH 30 DERHS TER GER!!!) Next time - a bunch of progress on my Gaige stuff, and I will be posting my first ever NOT (directly) COSPLAY RELATED TUTORIAL! It's goona be a "gooder" so stick around and you shan't be dissappointed (disclaimer: if you're disappointed, there is no legal action to be taken, and I might laugh just a little). Oh, and if you're looking for my Moxxi and Dr. Zed tutorials, there's a full list of tutorials in a wee box over --> on the right hand side of the page!