Showing posts with label Batman. Show all posts

Friday, 21 November 2014

Pop Expo Preview and Happy Halloween - Quick Baby Batman Tutorial!

Happy Halloween, internet!
<edit> This was written last weekend and I forgot to post it.  Ottawa Pop Expo is now TOMORROW, and the costume I wrote about at the bottom of the post is (almost) finished, and looks pretty darn good for only a week's worth of work! More later... </edit>

Hey internet peeps! Time flies when you're having fun, and damn is it ever flying - Baby Crankypants is already 4 months old! Halloween is already two weeks in the past at this point, but I had a great time getting things together for my munchkin, as in TWO costumes, one to match my Robin, and something new for Halloween AND Pop Expo - which means I need to make one so I can match her!

I'm sure it's no surprise that Halloween is my favourite holiday, eating candy, carving pumpkins into neat and intricate designs, and of course, dressing up in fun costumes - heck, it's that love of costumes that got me into cosplay in the first place! The big difference this year (aside from having someone small and cute to dress up alongside me) is that in February the hubby and I bought our first house - which means I could finally carve pumpkins and hand out candy! Another bonus with  having a house was that we have a little extra space, allowing my dear sister (remember, the one that REALLY likes Moria?) to come to the big city and look for employment opportunities not afforded in the small town where we grew up - and she's also on hand for assisting in baby wrangling and conspiring for pumpkin carving - where our mutual love of Moria took over!
Size tested!

After searching the city for a good spot to find pumpkins (the prices and sized BOTH sucked) I realized my backward logic and headed to the country - where I paid $7 for three sizable pumpkins, one of which was large enough to fit a small child (and yes, we tested this theory by plopping my daughter in it)!  Big Sis Crankypants took on the biggest of the three, doing what she does best, and drawing a lovely picture of Moria and his brick batties, then carving it out.  I tackled the other pumpkins with my dremel clone to give Moria MORE brick bats to keep him company, and voila! Pumpkins!


More pics are available at Big Sis Crankypants' Ask Moria blog
 We got great feedback from the neighbourhood residents, both young and old, though our efforts paled in comparison to the AWESOME Doom themed gourds that OTHER Big Sis Crankypants (younger than the first, but only by a matter of minutes) painstakingly dremel'd back home.
Holy effing crap they turned out awesome! Next year I wanna sculpt me some pumpkins!!

Anyway, so baby costume  #1 - big shock, a sweet little Batman to go with my Robin! It was super quick throw together for a party that was built around her Batman onesie - got a little one you want to turn into a Baby Batman?

You'll need:
-Batman onesie or plain gray onesie and materials listed here
-Long sleeve black onesie
-Black tights
-Black socks
-Black felt
-Black thread
-Black 3mm thick craft foam
-Yellow 3mm thick craft foam OR Yellow Worsted Weight Yarn AND an H8/5.00mm hook
-Scissors and/or xact-o knife

Onesie/cape - Don't have a Batman onesie (or don't feel like paying $12.99 for one)? Find a plain gray onesie and add the logo using the techniques in my tutorial to Customize Any Piece of Clothing. To make the cape, lay out the back of the onesie on a piece of bristol board and trace half of the neckline, then straight down to the desired length, throw in a few curves, and back up to the neckline diagonally. Fold the felt in half, and place the pattern on the fold, and cut out the cape! Pin in place along the back of the neckline and sew (by machine or hand) - done!

"Cowl" - Obviously a baby wouldn't be willing to wear a cowl for any extended length of time, so I made a little ear headband out of craft foam. The band was approximately 2 cm wide and 3 cm longer than the circumference of my daughter's head. One end was made into a little arrow, and a small slit was made at the other end to insert the arrow and complete the circle.  The ears were made in the correct shape with arrows just like the end of the band, and two slits were made in the right spots on the "top" of the band, and the arrows were pushed through slits! The headband stayed in place nicely AND she didn't mind wearing it one bit!

Belt - I crocheted my Baby Batman Belt, but if you don't crochet, it's easy enough to make one out of craft foam!

Craft Foam - Measure your baby's waist, and make a band in the desired width in the same manner as the band for the "cowl" above, but leave a little space as it babies are wiggly. The buckle can be cut out with an xacto knife, then slide the band through the buckle, and put the arrow through the slit around the baby's waist, then slide the buckle over the break in the band to hide the join.
Since this isn't field tested, I can't guarantee how long it will stay on for, but it should work for a photoshoot at the least, and may actually stay on well!

Crochet - Crocheted in 4 weight yarn with an H8/5.00mm hook, and totally made up as I went along - here's an approximation, but please understand I've never written a pattern before, hope it's legible:

ch - chain
sl - slip stitch
dc - double crochet
flo - front loops only

make a chain long enough to go around the munchkin's waist, then sl into first ch to make a circle

ch 2, dc in each ch around and sl into the top of the ch 2 - repeat until your belt is the desired thickness (I hit 3 rows)

The buckle gets tricky, so I made a diagram, though I'm not sure if it will help any! In each frame, the blue symbols are the current work, and the black are past work.


ch (enough to get across the belt) and sl into the bottom
ch 2 (to make first dc) and dc in each ch back across, sl into top
ch 2 and dc flo across to the desired width, cut and work in end

Attach at bottom, and repeat the same steps to complete the rectangle!

I know it's kinda wishy washy, but it allows you to customize it to the baby in question!

My widdle Dark Knight and I! FYI, she's too damn cute!
Putting it together - Probably obvious... but! Long sleeve black onesie on the bottom, then black tights (unless there's a skirt attached, like my little lady's), then the Batman onesie, followed by socks, headband, and belt! Taa-daa! You have your own little Baby Batman! To complete the look, add your own Robin costume, and voila, Parent/Baby Halloween perfection!

Off to save the princess before she can walk!
Alright, I know, what could compare? Baby Crankypants'  Pop Expo costume, dubbed Babby of Time by Big Sis Crankypants, I give you - Mini Link! I lovelovelove how this costume came together! The original concept came about when I was working on her Hylian Shield Zelda onesie back before Father's Day.  I had the template for each piece of the Hylian shield, so I cut each piece out in craft foam, intending to surprise Lord Crankypants with a mini-shield to add to his prolific collection of Zelda stuff, and for us to photograph the munchkin with during her newborn shoot!  Weeeellll, that never happened, and the pieces just sat around in my craft room waiting for a higher purpose.

Finally, with Halloween looming I got to work! Since I had a lot of sewing to do, I put the shield together, shaped, sealed, primed and sprayed it silver, then got my sister to paint it while I worked on the rest. This is as far as I got by the Halloween engagement where we debuted our tiny Link! I'll post more about my Mini-Link and how to make your own in the future.  With Ottawa Pop Expo coming up on November 22nd, I had already given up on finding the time to finish my Gaige, so I had decided that I wouldn't worry about getting a costume together for myself... then went back and forth for a whole ten days.  This led to an inevitable identity crisis, something about being only a "Mom" and no longer the person I was before, and finally I gave in and resolved to get to work on a Zelda costume for myself! 


Zeeeeellllllddaaaaaaa!
Aside from time (well, I guess alongside time) my biggest challenge will be battling my perfectionism - I have resolved to aim for recognizable rather than perfectly accurate. I chose Twilight Princess Zelda as I was using Twilight Princess Link to model the little lady's costume after, and decided to dedicate my time to the most identifiable and unique parts of the TP Zelda version - her banner, jewelry and armour. Instead of trying to sew something together in just 12 days, I picked up two dresses, one ivory and one purple to modify, and have already tracked down some lovely long gloves. I've already sewn the banner and painted the background colours (that ombre blue/gray was a PAIN!) - now all I need is for this weekend's house guests to go home so I can get back to work! The clock's a-ticking, keep watching to see how much work I actually get done before Pop Expo!

Hope all is going well out there in internet-land and that the rest of the world had an awesome Halloween! Next time I'll post about Pop Expo and maybe share a little on how to make your very own Baby Link costume!

Monday, 13 October 2014

Tutorial - Customize ANY Piece of Clothing!

For Gondor!
Hello world!!  I know this is pretty well my customary introduction by this point, but I guess it continually amazes me that people actually take time to read my blog - so thank you for reading, and holy heck, we just topped 14000 pageviews! I know it's been a little while since my last update, but now that Baby Crankypants has moved through both the will-only-nap-on-someone phase and the will-not-nap-at-all stage, we're finally at the will-nap-on-tummy point, and she's been known to go up to THREE hours at a time (though not dependably).  With more nap time comes more handsfree time for me, and more time to get back to work on cosplay! I'm not sure how much work I'll be able to get done between now and then, but Pop Expo is coming up at the end of November (Gaige is back on the table... if time permits), and of course I NEED to put together  a Halloween costume for the little miss, so there's plenty to be getting on with!
Okay, so I've promised this one over and over, so I figured it was time to finally follow through - my first NON (directly) cosplay related post! That said, it's totally applicable to cosplay as well, and I can think of all kinds of applications from non-embroidered patches to the back of Claire Redfield's jacket, to the T-Shirts worn by pop-culture icons and more - really, if you have the patience, you can customize ANY piece of clothing!

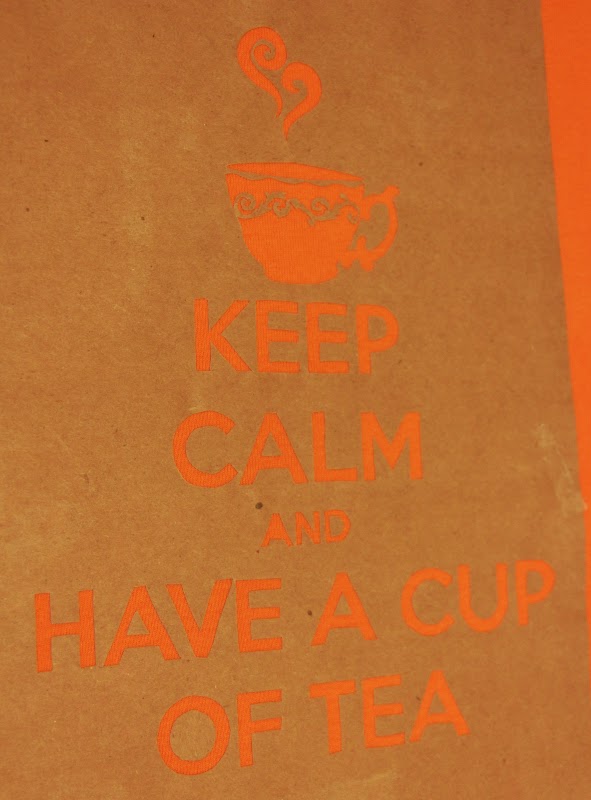
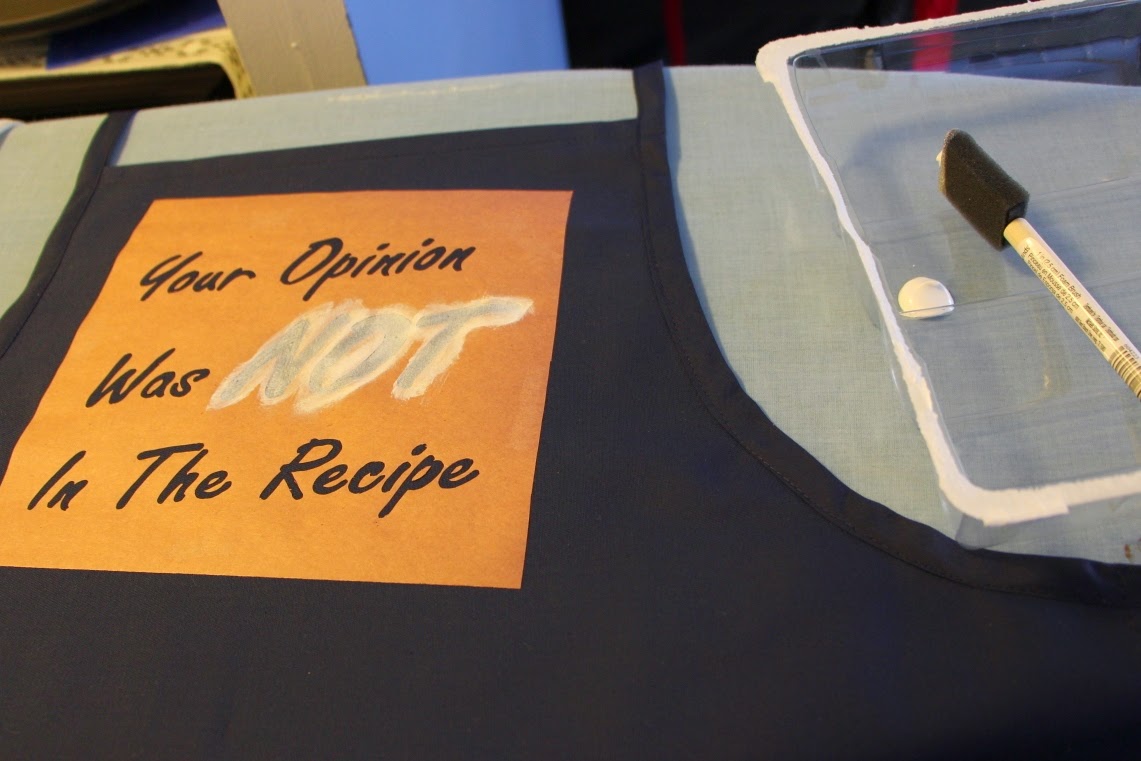
As of this posting, I've used this exact technique to customize five shirts, an apron, three onesies, two stocking labels, the "R" patch for my Robin costume, the batman logo for the hubby's last minute batman costume.... So on and so forth! Imagine the gifts you can make - the perfect shirt to fit the recipient's fandom/attitude/favourite drink/favourite car/whatever they'll appreciate most - EVERY time! I'll list the base technique first, then a few advanced variations to help make any piece you might want:

You'll need:
Your design, printed or drawn, in the correct size
Paper that's waxed on only ONE side (butcher or freezer paper)
Carbon paper
A pencil
A cutting mat
An exacto knife (a cutting machine like a Cricut or Silhouette Cameo may also be useful, but I'm not that fancy)
A piece of clothing or fabric that you'd like to give a personal touch (ensure it has been machine washed/dried beforehand for pre-shrinking)
An iron and ironing board
Sponge brushes (or preferred brush type)

Then your choice of paint, either:
Fabric paint (any kind works, whether puffy, dimensional, slick, dollar store special or jacquard, just try to use all the same to avoid a texture mess)
-or-
Acrylic paint and acrylic fabric medium

For ease of writing, the instructions will be written as though butcher's paper is being used (as that's what I use) and geared towards making a shirt, but you can sub out "butcher's paper" for "freezer paper" and "shirt" for whatever you want to work with - sweatshirt, scrubs, pants, scrap fabric - as you go.

First thing, find the design you want and get it on paper. If you're going freestyle, you can draw directly on your butcher's paper (the NON wax side), otherwise you'll have to size it out on the computer, then print it in the size that you want on your shirt. Make sure you're happy with the size before you move on.

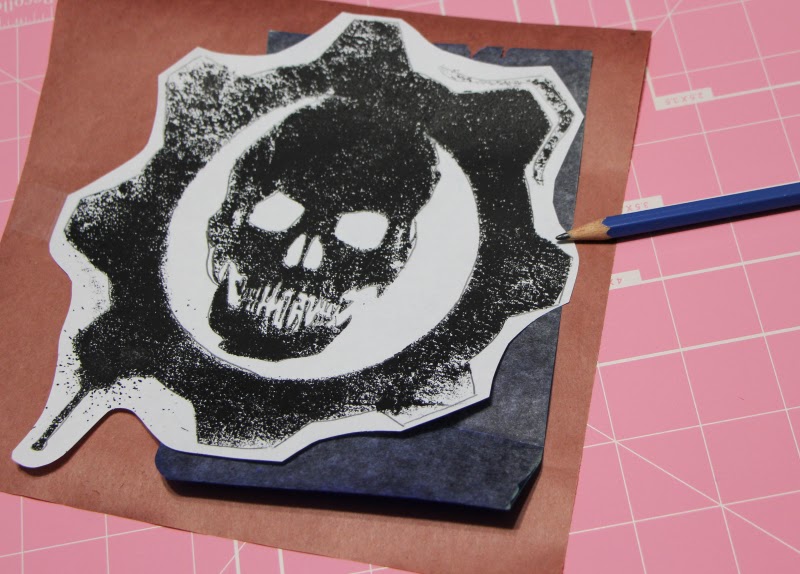
(Skip this step if you drew directly on the butcher's paper) Once you ARE happy with the size of the design, place the carbon paper on your butcher's paper, then lay the design on top, taping the corners down to the butcher's paper (the carbon paper can free-float, just make sure it's under the area you're tracing).  Then trace the lines of your design with a pencil to transfer the design on to the butcher's paper, making sure you don't move the design paper once you start tracing. Make sure you get all the lines and all the details, then carefully lift the design and carbon paper to double check that the transfer is complete.

Before you say - "why bother tracing it on if you could just tape the design to the butcher's paper and cut through both layers" - don't. I've been there, it works, but it's a pain, ESPECIALLY for anything with curvy lines or intricate details. Cutting through only the butcher's paper is much easier.

Once the design is on the butcher's paper, hit the cutting mat and cut out the design. Be careful to preserve the inside pieces of hollow shapes (like the triangles in "A"s or centers of "O"s) and keep them aside for when you apply the paper to the shirt. When finished, you should have an outline, and all the inside pieces you need - paper will cover anything that DOESN'T need colour, so any cut outs (negatives) that will need colour can be discarded.

Heat up the iron, making sure steam is OFF, as steam will prevent the paper from properly adhering to the fabric.  Carefully lay the outline on the shirt, paying attention to the orientation you desire (straight up and down or skewed in one direction or the other) and iron it on ensuring the paper and fabric stay flat. Carefully lay out the inside pieces, and iron them down too - be careful, as these pieces LOVE to move - feel free to iron on one at a time if you have trouble. Gently test the edges to ensure all the pieces are well adhered and re-iron pieces that are not.

Insert a flat barrier inside the shirt to prevent paint bleed-through from the side you're painting to the other side of the shirt. I usually use scrap cardboard or layers of scrap paper.


Finally - the fun part, painting! Squeeze your fabric paint into/onto whatever you're using as a pallete (I often use plastic containers from the recycle bin), then sponge on with the sponge brush. Make sure to take out only little bits of paint at any one time, otherwise it will dry in the palette before it's used. The first layer will take quite a bit of paint, as the paint needs to soak into the fabric fibers. Allow each coat to dry a little (15-30 min works) before applying additional layers.
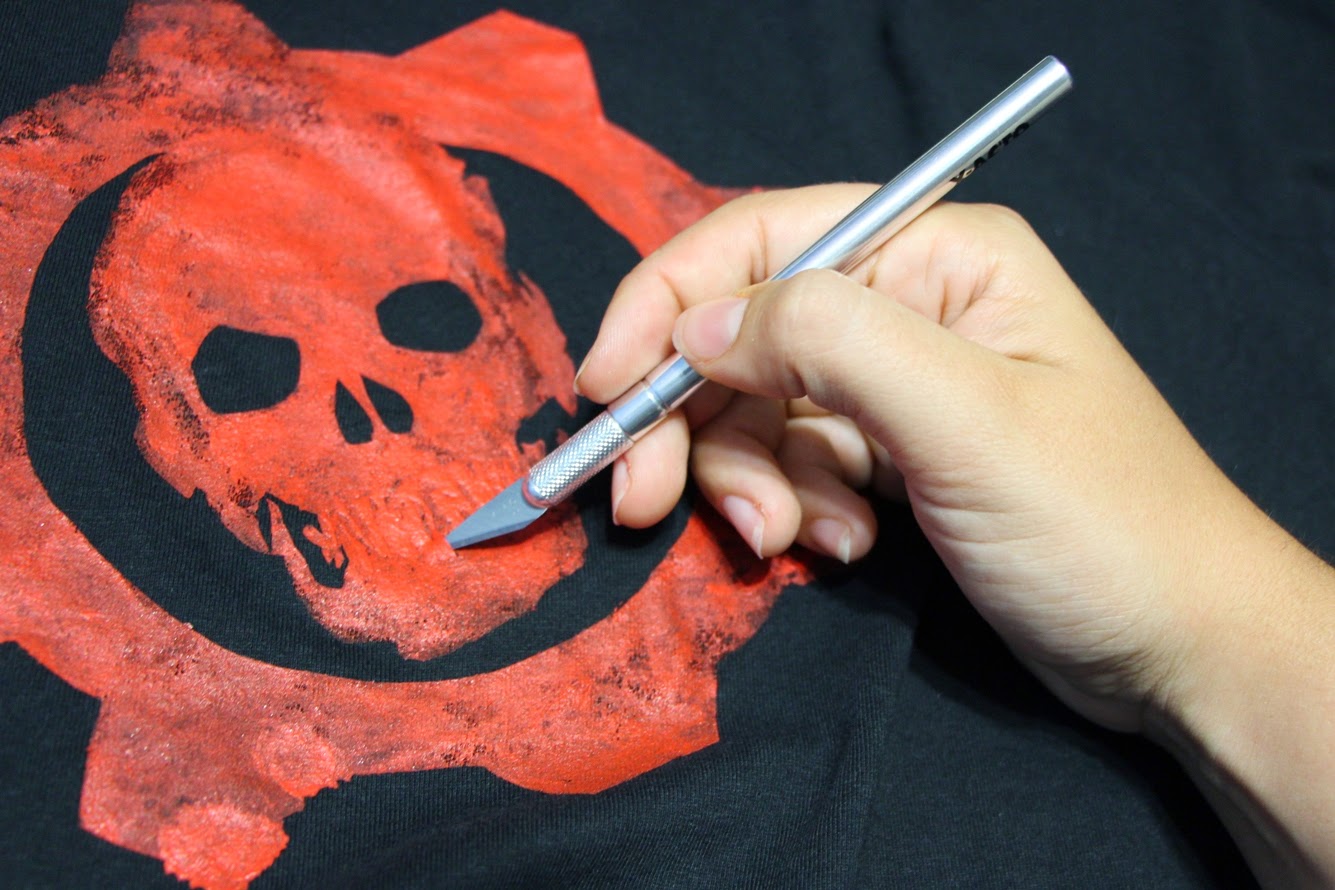
Once you've painted enough layers to be satisfied with the degree of coverage, you can remove the butcher's paper.  I prefer doing so while the paint is still somewhat wet, as sometimes the design can crack a little if removing the paper while dry, just be careful not to smudge any still wet paint. Carefully remove inside pieces using the exacto knife to lift corners and peel out.

Once paint is dry (in accordance with instructions on bottle) run the iron over the painted design to heat seal. Make sure to wash shirt inside out to prevent damage to the design.

And that's the basics! The result - one unique piece of clothing!

Alternate techniques


Be warned, these are harder and/or more time consuming than the basic method, and not to be attempted by the faint of heart!

Designs with multiple colours

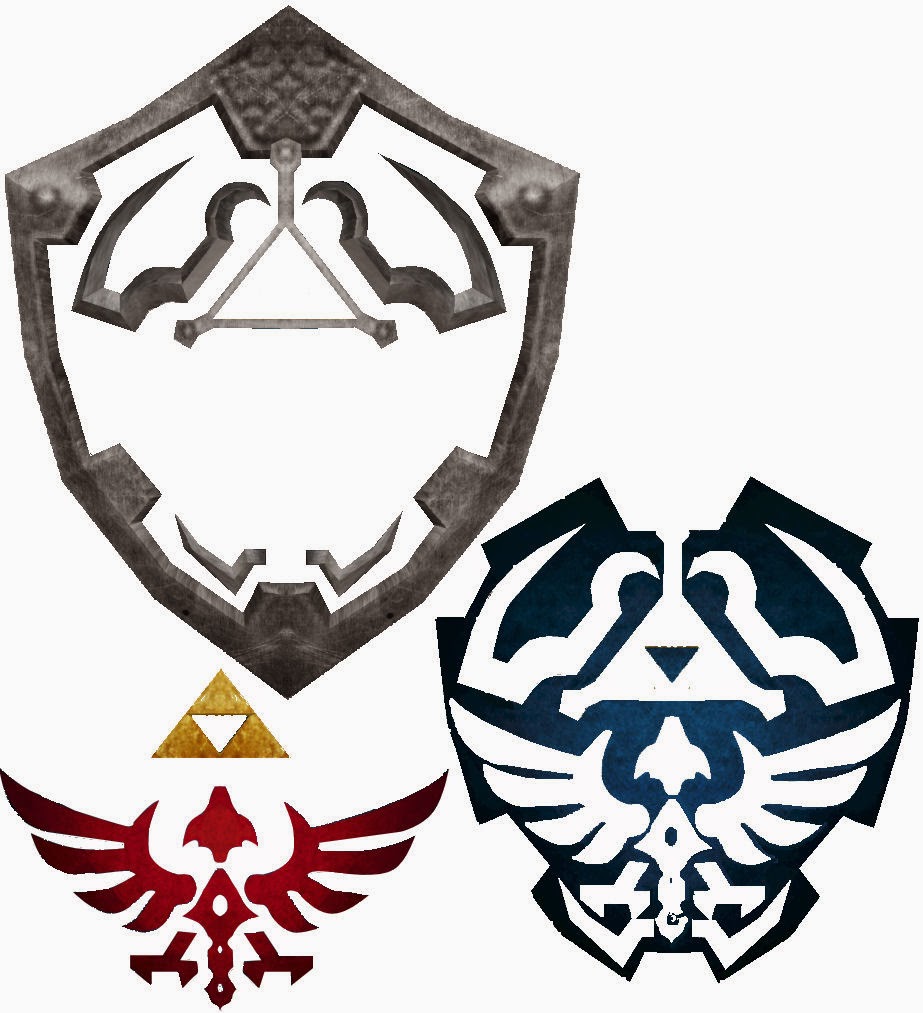
Some designs have multiple colours mixed in the one stencil, but others need different blocks of colour, example - the Hylian Shield has four distinct colours (silver, blue, gold/yellow and red) for which I made three seperate butcher's paper stencils.

For this technique, I separated the shield into colour based "pieces" in Paintshop Pro before printing, making sure to leave some extra "blank" space between the colours (a gap of a few pixels) to keep myself from having colour overlap. I left the gold/yellow and red on the same stencil set as they're separated enough that they could be painted in without bleeding together.

The same tracing and cutting techniques as above were used to make the stencil sets.

I started with the innermost design (the triforce and bird) as I figured it would be easier to build my way out from there. Once I was satisfied with the level of coverage, had removed the butcher's paper and had allowed the paint to dry, I applied the stencil for the blue, including pieces which were ironed directly on to the red and gold/yellow paint. Once the blue was satisfactory, the stencil removed and the paint had been allowed to dry, I ironed on the silver stencil, including a piece applied over the blue, red, and gold/yellow paint, and painted in the silver.  With the silver complete, I peeled off the last stencil and allowed the silver to dry.


Hylian Shield
One piece at a time!
Finally, for added dimension, I used my silver paint tube (designed to be used as a writer) to add the rivets and lines on the "metal" pieces to make the shield really "pop!"

Another design that used multiple colours (though only one stencil) was the Grub Killer (Clayton Carmine) design I put on the back of a shirt for one of my Gears Buddies.  On Carmine's armour, the "Grub Killer" and little omen appear to have been spraypainted over blood spatter, so I painted on the spatter manually (no stencil) and allowed it to dry before ironing the stencils over top - worked like a charm!
  
Varied/sketchy colour

Sometimes solid colour won't provide the right look. For example, for my Crimson Omen shirts, to be accurate the red has to be varied - stronger in some areas and lighter in others. This was accomplished by sponging the colour on more lightly in some areas than others, adding extra layers where the colour is more intense, and painting in veins with a paint brush. I was careful to make it as close to the original as possible. Oh, and the little splatters around the drip were added by toothpick after the fact.


Detailed Painting

Warning: You need artistic ability, lots of time (the example took me a solid two hours for painting alone, not including dry time), and various paintbrushes for this. Also, instead of the tulip style fabric paint (from tubes) acrylic paint and fabric medium were used as they're thinner and more easily mixed.

Sometimes colour blocks aren't the look you're going for - you want details, gradients, and little finagly things like that!  For example, my Majora's Mask onesie just wouldn't be the same without the blending and little details.

In this technique, the butcher's paper is only used to make the outline of the design.  Once the outline was made, I painted it in with several layers of white to create a smoother base for painting - if you were to paint details directly on to the shirt, the fibers would make it one heck of a mess!

Unlike in the colour block method, I left the stencil in place to prevent any of the colours from ending up on the rest of the onesie. I drew the details lightly on to the white with a pencil (I used the cut-out of the mask, folded in half then eyes cut out to ensure symmetrical eye placement) and proceeded to paint, mix, and blend the colours as necessary to create the effect I wanted.

Majora's Mask Outline
Outline - Eye Placement - Pencil Sketched Details
Once everything was painted in as I wanted it, I removed the stencil.  Finally, to add some dimension I used my black fabric paint writer to outline the eyes, et voila! Perfect MM onesie! I'm not sure how well it will wash (I'm a little worried, but won't even try it 'till our little lady has worn it at least once) but I'll report back when I know!
Majora's Mask Colouring
Inside Colour - Horns - Finished!
So voila! Think of the possibilities! Fun, geeky shirts for less than a fortune! Personalized gifts for ANYONE! Customized shirts/costume pieces/patches for your favourite characters! I love this technique, and just can't get enough of it! PLEASE, if you use it to make something awesome, let me know, either by email - lady.crankypants@gmail.com, or by posting it up on my facebook page - http://www.facebook.com/crankypantscosplay! No promises on timeline between now and next post (I'd probably break it anyway) but rest assured I'll let you know how my Halloween costuming goes, and there will surely be some adorable pictures involved!  Until next time, you stay classy, internets!

Saturday, 26 October 2013

Moxxi Part 13 - Makeup and Hair (and Last Minute Batman)

Cheap-ass Batman Cowl
Running... In this.
As if.
Happy Robin!
Love those scales!
So my big race is tomorrow, and I'm happy to say I made my fundraising goal! Well, really, after my half marathon, a 10k doesn't feel that big, I'm just jazzed I get to run it in costume! Speaking of which, guess what the hubby decided YESTERDAY. Yes, the man who saw me busting my butt getting Robin together at the beginning of the month decided he was going to wear his half-assed Batman costume that was put together for the same Superhero Scavenger Hunt that the first version of my Robin costume was for. "Maybe I'll wear my apron over the technical shirt... I have the cowl too." Yes, husband, I'm sure you'll happily run 10 km with a kid's cheap plastic Batman cowl strapped to your face. As if.

So I sprung into action and started work on a cowl (Adam West style). Really, they're quite a bit more complicated than I had imagined, but I think I can pull off a modified version! Last night I made the face plate out of craft foam, then patterned the main hood out using the fabric from an orange shirt that I had picked up at the Salvation Army Thrift Store ages ago for another project (for which it was wholly unsuited and made a big mess of
Orange Derpman!
Almost finished mock-up (fits him better) - Next, in black!
orange lint everywhere). I put together my dummy cowl, and tailored it (to the best of my ability) to the hubby's head - a process he did not enjoy both because it distracted him from playing Batman: Arkham Origins, and because he apparently doesn't trust me with pins - I promise, I didn't prick him! Tonight, I will be ripping my tailored orange cowl apart and using the pieces as a pattern for the final version! Luckily, I just happened to have some black spandex hanging around (which was going to become my arm-glove for Gaige).  If I have any time left, I'll make a bat logo for him to pin onto his shirt instead of having to run in an apron. Easy peasy (I hope)!


Check me out, getting all distracted again! My masterpiece, she was almost complete! Really, putting the costume pieces together is the hard part, but I was really worried about the makeup as it's REALLY not something I have all that much experience with. The hair, on the other hand, I wasn't too fussed about, I asked my hairdresser for advice, and knew what I had to do.  Funny how the little ironies of life work, as I was totally happy with my makeup, but thanks to the rain and high humidity the day of the convention, my hair was pretty well ruined by the time I ended up inside. 

Moxxi's Makeups!
The LAST step! MAKEUPS and HAIR!
Materials needed (I listed the exact makeups I used, but use what you can find) - 

-White water based face paint (I used Craftobian Disguise Stix in Clown White)
-Makeup sponges
-Makeup brushes
-Pink blush (I used Hard Candy's Fox in a Box Truth or Dare)
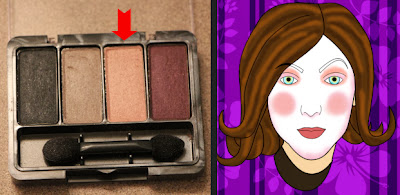
-Peachy pink eye shadow (I used CoverGirl 274 Fairytail)
-Black eye shadow (also in Covergirl 274 Fairytail)
-Bright red lipstick (I used Rimmel 180 Jet Set Red)
-Black WATERPROOF liquid eyeliner (I used H2O Proof 881 Ultra-Black)
-Black volumizing mascara (or fake eyelashes)
-Black, red, and white acrylic craft paint
-Brown wig (or brown hair... I just used my own)
-Hair straightener and/or curling iron
-Lots of hairspray!
-Black nail polish (I used Sally Hansen Diamond Strength 480 Black Diamonds)
Makeup-less Moxxi? For shame!
No makeup? How plain!

So on to what I did well! The makeup! Welcome crappy lineart Moxxi (I pushed that pesky hair out of the way so we can see both eyes), who I put together in Paint Shop Pro for this guide because I totally forgot to take pictures as I was doing all this at approximately 6:00am the morning of the convention. I'll try to remember to take some step by steppictures next time I wear Moxxi (maybe even Halloween? We'll see)!


Step One!
Step One - Full face white waterbased makeup
Starting with the face - first layer is a nice even layer of white face paint ALLLL over the face, right up to the hair line at the top, to the ears on the side, following the jaw line, and covering the eyebrows. I used a water based paint as it dries nicely, doesn't smudge like oil based face paint, and I needed to apply more makeup over top of it. Now I went and forgot to pick up makeup sponges and ended up needing to use a kitchen sponge instead (oops). It worked well enough, but took a lot of work to get smooth and even.

Step Two!
Step Two: Light pink blush/eyeshadow

Next up, I applied the light pink blush.  Two nice pink circles on the apples of the cheeks, I didn't go as dark as I should have, but I was trying to be delicate. Then I also used the blush as the "shading" around the edges of the face, and under the nose. Also, as it was just the right shade of pink, I applied it using an eye shadow brush directly on my eyelids.


Step Three!
Step Three: Peachy-pink eyeshadow
The peachy pink eye shadow then went over top of the eyelids, and around the perimeter of the eye.


The black eye shadow went slightly tighter around the eye.  I also put on my lipstick at this point, nice bright red.
Step Four!
Step Four (and Four point Five): Bright red lipstick and black eyeshadow

Then came the fun part - the liquid eyeliner.  Did I mention the part where I don't really use makeup all that often? Well, liquid eyeliner is a bit of an advanced tool in makeup, and while it worked, I definitely ended up dabbing it off my eye with a q-tip more than once.  Icky. I made sure to get waterproof as I needed to put some on the underside of my upper lip, and didn't want it smudging and spreading. It still did a touch, didn't make a mess or anything.

Step Five!
Step Five: Waterproof liquid eyeliner EVERYWHERE!

Okay, so the eyeliner went first where eyeliner usually goes (the hard part). The edges of the eye were extended just a bit on the right eye, then a little further on the left where the "tears" come down. I went a little conservative on the black tears, I only drew on three, and ensured that there would be a little "web" at the top where the drops come down. I used just a little on my eyebrows to draw them back in, but tried not to go overboard. Then the rest of the cell shading came in! I did lines around and on the button of the nose, and over the top of the chin just under the lip. The lips are a little complicated - a very thin line on top, then a thick line around the bottom of the bottom lip.  I also shaded under the top lip, and had to stand around with my mouth open for a bit to ensure it was COMPLETELY dry.  Aaand the little curve out to the right of the lip, of course.  The final touch was the beauty mark.


Step Six!
Step Six: Pick your own eyelashes
I didn't bother trying to draw this stage, but I applied the black volumizing mascara at this point. I had planned on picking up fake eyelashes to give that extra little emphasis, but they didn't have any to my liking at Wal Mart when I was picking up all of my makeup and hairstyling goods. You can't really see Moxxi's eyelashes in detail in Borderlands 2, but in the first Borderlands she appears to have eyelashes that are very long on the outside of the eye, and pretty well unnoticeable on the inside. I'll look for them again beofre next wear.
Step Seven!
Step Seven: White paint. On your lip.
Not bad! Speedy PSP sketching win!

Finally, I highlighted the lips with white acrylic craft paint - a thin line along the top of the top lip, a thin line along the top of the bottom lip, and little dashes and lines down from there as necessary. Again, I stood around with my mouth open to allow the paint to dry. Face finished!


Introducing crappy lineart Moxxi chest, here to help with the rest of the makeup! For the chest, I started out with the liquid eyeliner, making the marks as per the reference - collarbones, cleavage, and little dashes where necessary. I painted the heart on in red acrylic craft paint, then once it was dry, outlined it in black acrylic craft paint, and painted on the "shine" in white. In putting this guide together, I noticed that I applied the shine on the wrong side of the heart - oops! And with that, my makeup was complete! I then coated my face and chest with a thin layer of hairspray to help seal all the makeup in, carefully closing my mouth and eyes so as not to poison or blind myself.

Chest Makeups!
Blank| Step One: Liquid Eyeliner Cell Shading| Step Two: Red acrylic heart| Step Three: Acrylic black outline, white shine
Don't forget to bring your makeup with you to the con! I needed to touch up a few times over the day!

On stage during the Masquerade!
Poofy, wavy, messy hair.
Photo from Just Push Play Ottawa
On to the hair! So as I said, this was pretty well a disaster in the end, in part due to the weather, and also because I wasn't willing to cut my hair as short as would have made my life easier (I grow and donate my hair every few years, so I don't tend to take all that much off if I don't have to). Okay, so first things first, I straightened the whole head so it would be nice and smooth, and gave an overall coat of hairspray. Now, the theory for the curls is that to get them to curl UP instead of corkscrewing, it needs to be pinched (in either a hair straightener OR a curling iron) then pressure needs to be applies as the tool is pulled downward, then start twisting slowly upward when you reach the point where you would like your curl to start, and keep turning until you're out of hair.  Keep to smallish chunks of hair, and hairspray each one as you go along.  Once it's all done, give a final decently heavy coat of hairspray over the whole mess. And it was almost perfect!! Uuuuuntil the rain and humidity and whatnot, after which the curls released, and my hair went right back to its standard wavy, poofy self. 

Nail polish!
The very last bit, the nail polish! Easy peasy, black nail polish, and I painted it on standing in line because (if it isn't obvious) I ran out of time! So there we were, standing outside in the line up, Julian holding the little bottle of black nailpolish while I painted my nails. It was a moment to be sure! 


And that is it! She was finished! I have a bunch of work to do before I wear her again, but I'm a wee bit preoccupied with Rubi at the moment, and have Gaige to worry about when I finish Rubi.  I have everything that I believe I need for the moment (though as you know, there's always more to buy, no matter how prepared you think you are) and I'm really looking forward to seeing her come together! That said, when I DO fix Moxxi, I'll be sure to keep you updated on the progress, and if I come up with any new and exciting ways to do things, I'll be sure to post all about it! If you find yourself trying to follow along and have any questions, feel free to let me know, and I'll be happy to help shed some light on my methods of madness!

INVINCIBLE! Muahahaha!
My cover shot from the Ottawa Sun's Digital Lounge - I'm Invincible!!
So next time, my first non-tutorial post! Shock! I'll be talking about my experience as Moxxi at Ottawa Comiccon, and sharing some pictures of our costumes, video from the masquerade, and, of course, sharing the latest progress from my Rubi! She's getting there I tell you! Oh, and I'll report back on how the Batman experiment went, and give you a Race Report - until then!

Every single Moxxi cosplay tutorial you could possibly need to make your very own Moxxi! (Or so I would like to think!)


Part 1 - Spats
Part 2 - Finding Fabric and Starting the Jacket
Part 3 - Jacket continued, Stripes and Zipper
Part 4 - Cuffs and Collar
Part 5 - The Button Solution
Part 6 - The Patches!
Part 7 - Belt and Buckle!
Part 8 - Rubi's Holster and Garter 
Part 9 - Finishing the Jacket, Piping, Rick-Rack, and Curly Tails!
Part 10 - The Hat, Card and Feathers!
Part 11 - Cell Shading and Blood Spatter
Part 12 - Shopping and Accessories to Complete the Look!